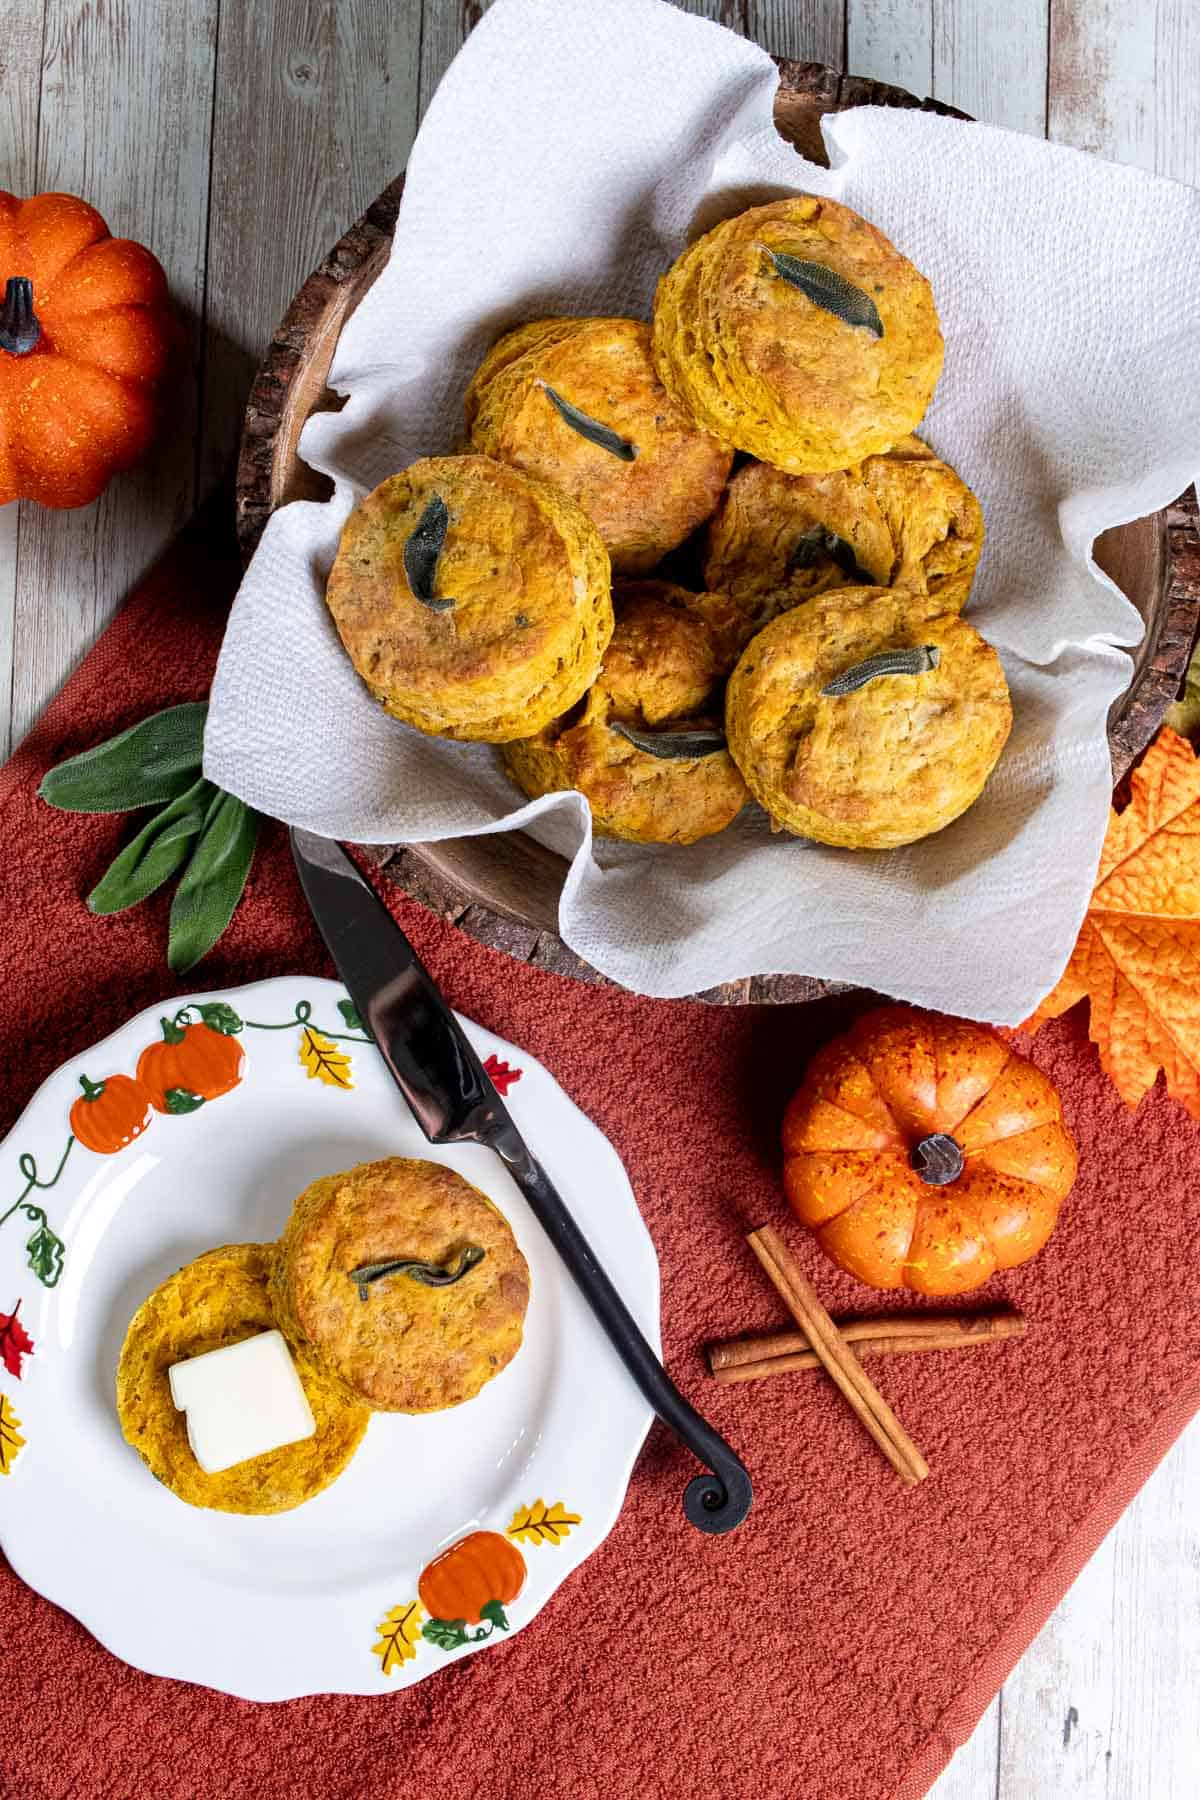
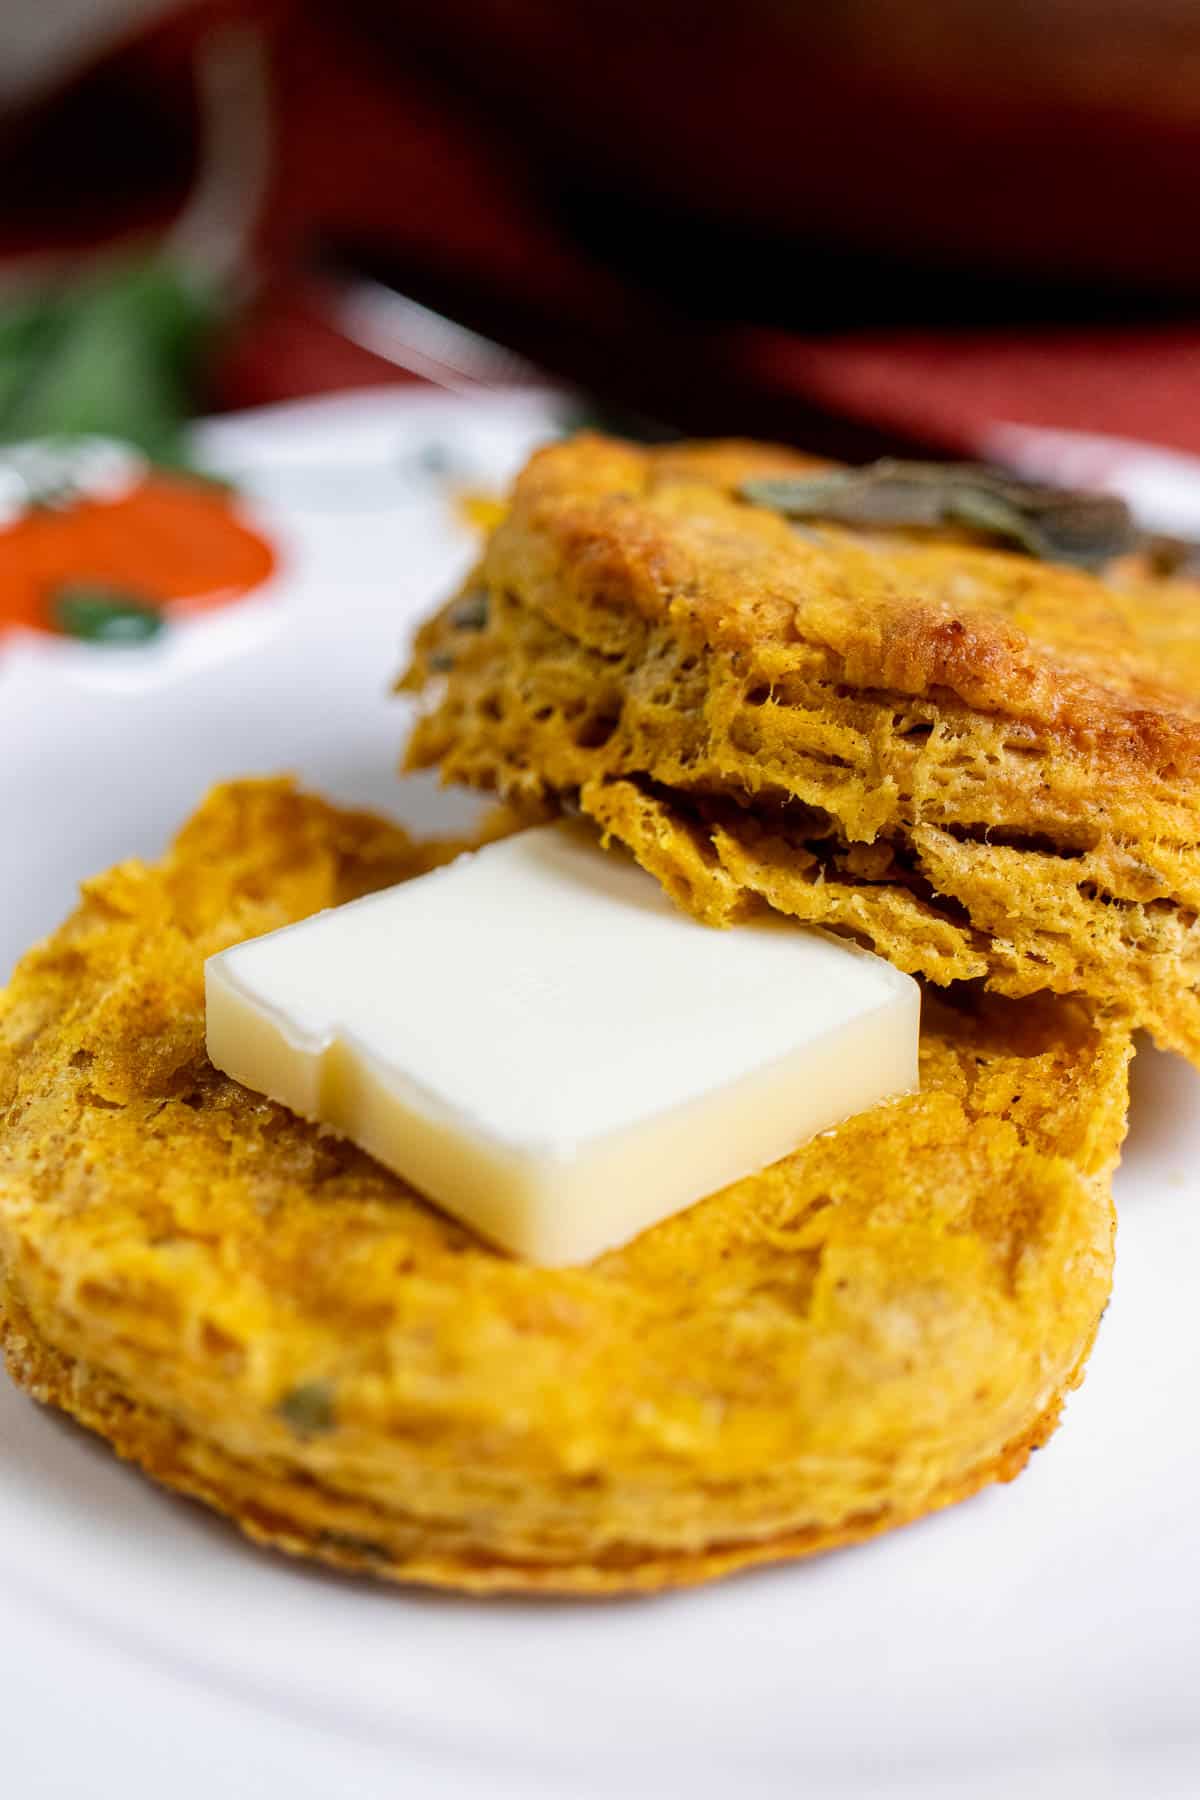
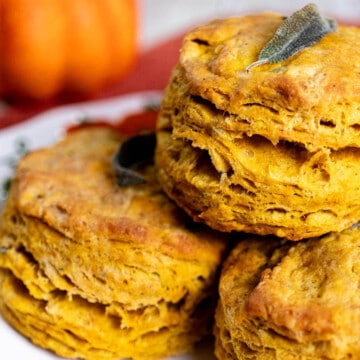
These flaky, tender, buttery pumpkin sage buttermilk biscuits are a perfect addition to a fall menu. The pumpkin biscuits are filled with fresh sage and warm, fall spices, making these savory biscuits a new fall favorite and a great compliment for a Thanksgiving spread.
Buttermilk biscuits and sage biscuits are great on their own, but the addition of pumpkin puree and some pumpkin spices here really sets these apart. While some biscuits can taste a bit more on the sweeter side, these pumpkin sage biscuits are more on the savory side. With the peppery bite of sage and warm spices, these pumpkin biscuits have a punch of flavor while remaining as flaky and buttery as a great biscuit should be.
Pumpkin sage buttermilk biscuits also come together quickly and can be prepped and baked in less than an hour. There’s plenty of leftover pumpkin puree as well, so if you’re looking for something for your sweet tooth also, consider making some pumpkin snickerdoodles, or these amazing pumpkin cheesecake brownies for a rich and fudgy treat.
Jump to:
🥘 Ingredients for Pumpkin Sage Biscuits
Biscuit recipes typically use common pantry staples, so you shouldn’t need to go out and get much more than some pumpkin puree (or make your own) and some fresh sage.

Flour – Plenty of all-purpose flour is used here. You could use other flours, but I find bread flour and wheat flour can get a little dense, while cake flour can get a little… well, cakey. Which isn’t always bad for tender biscuits though either!
Sugar – Just a bit of brown sugar helps to balance the savoriness of the biscuits and enhance the pumpkin flavor. Sugar also helps to keep the biscuits tender. You could also substitute maple syrup instead, for a sugar-free version.
Leaveners – A good helping of baking powder gives biscuits their signature rise, with a bit of baking soda as well to interact with the brown sugar and buttermilk.
Spices – Use a mix of salt, black pepper, cinnamon, nutmeg, and cloves here to complement and enhance the pumpkin flavor. You could also swap in some pumpkin pie spice if you prefer.
Sage – Use a small bunch of fresh sage leaves and finely mince enough for two tablespoons. Alternatively, you could use 2 teaspoons of dried sage, but fresh is much more flavorful here.
Butter – A stick of butter thoroughly mixed into the dough gives biscuits a lot of rise and flavor. You can pulse it into the dough with a food processor, cut it in with a pastry blender, or grate it directly into the mixing bowl. Use salted or unsalted. If using salted butter, I don’t adjust the added salt, but I kind of prefer biscuits to have a bit of saltiness to them.
Pumpkin – Use canned pumpkin puree here, not pumpkin pie filling. The pie filling has added sugars and spices and preservatives you don’t want in the biscuits. You could also use homemade pumpkin puree, or substitute pureed sweet potato or butternut squash as well.
Buttermilk – Buttermilk gives the best, slightly tangy flavor to biscuits. If you don’t have any, you can add a teaspoon of vinegar or lemon juice to a measuring cup and fill the rest with another milk. Let it sit for a few minutes and stir together to slightly curdle before using.
🔪 How to Make Pumpkin Sage Biscuits
One of the tricks for flaky biscuits is using cold butter, so keep the butter in the fridge or freezer until you need it.

In a large mixing bowl, combine the flour, baking powder, baking soda, salt, black pepper, spices, and sage. Whisk to thoroughly combine and distribute the ingredients, then set it aside.

Measure the buttermilk in a 2-cup liquid measuring cup, then add the pumpkin puree and brown sugar. Stir or whisk the ingredients until smooth and fully combined.
Now take out the butter and grate it directly into the flour mixture. Alternatively, you can cut the butter into cubes and use a food processor, pastry blender, or forks to work the butter into the flour.

Pour the wet mixture into the flour-butter mixing bowl and using a rubber spatula or your hands, work the dough together until just barely combined. It should look shaggy and kind of dry still, that’s normal.
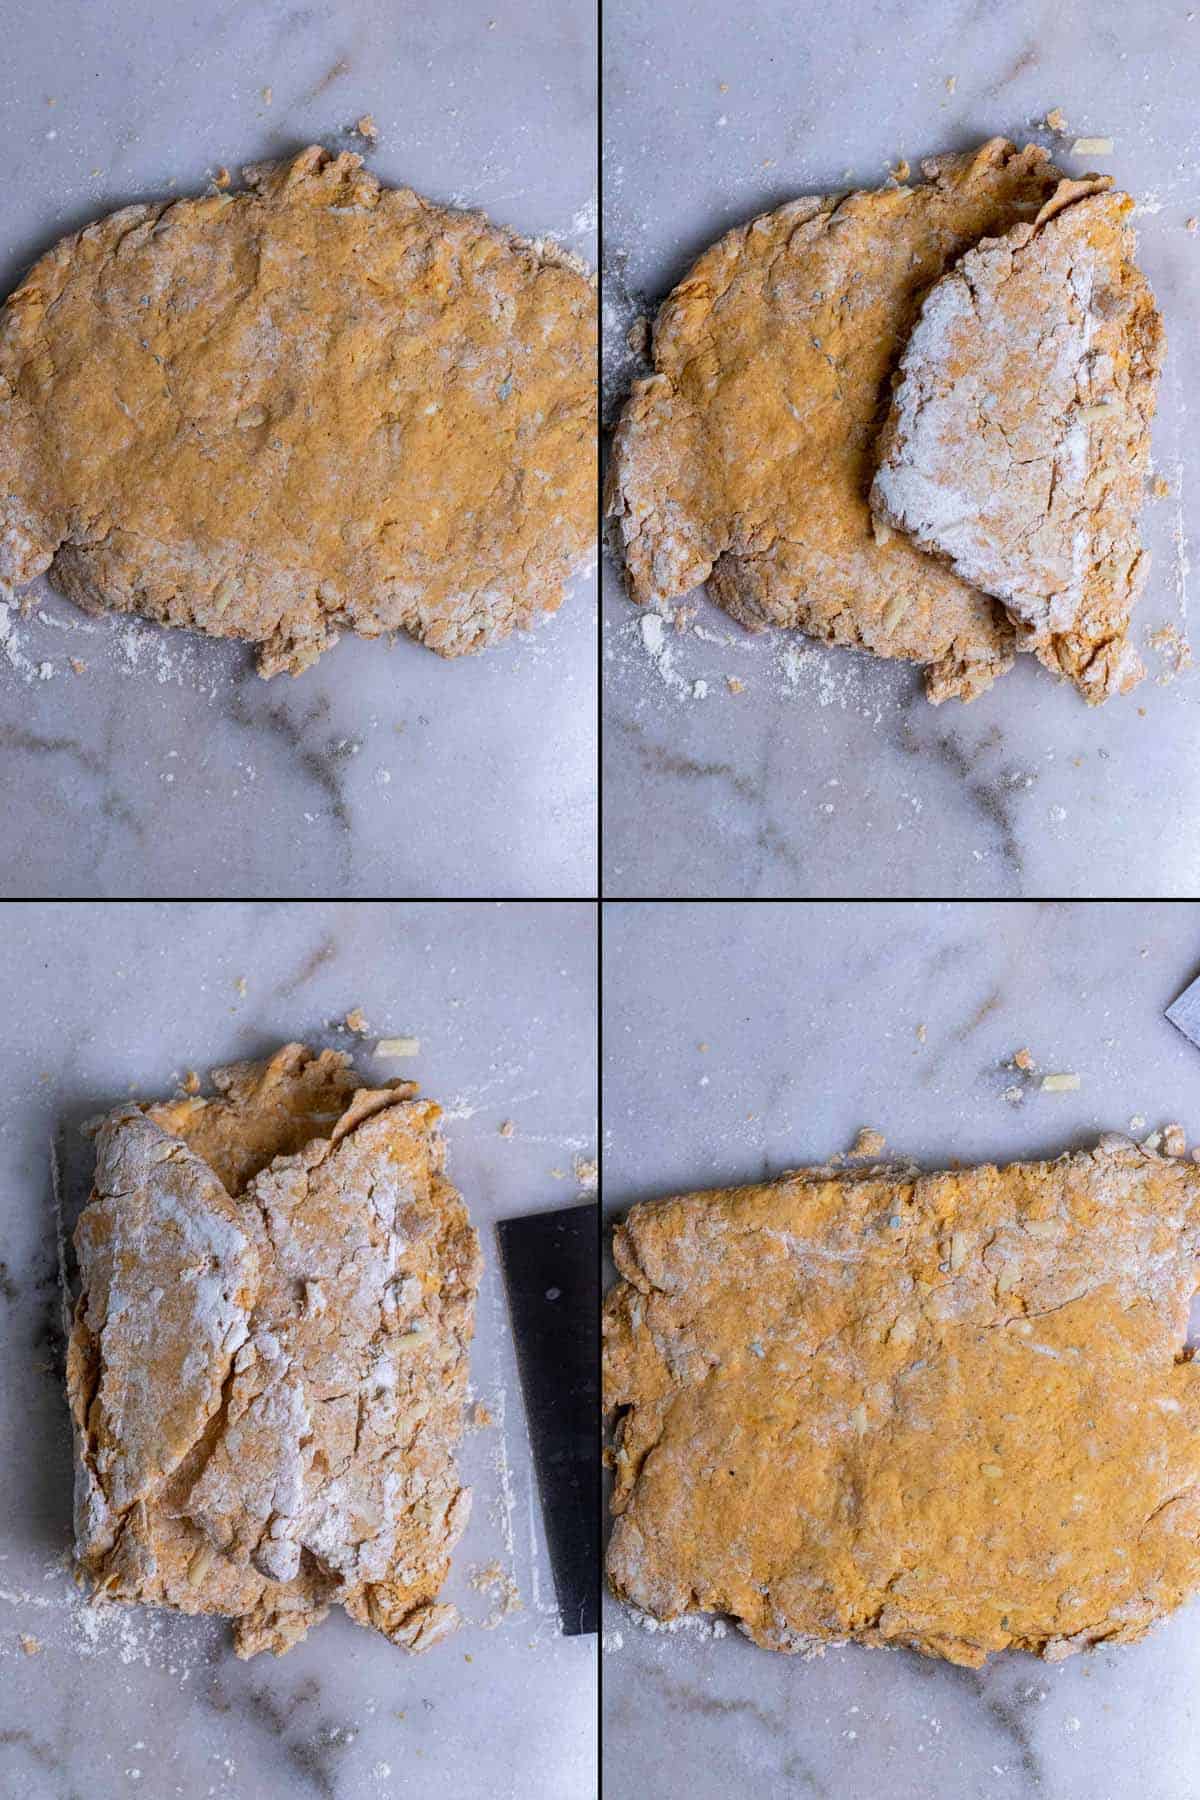
Turn out the dough onto a floured work surface or pastry mat and gently press into a rectangle about 1” thick. Use a pastry cutter/bench scraper or your hands to fold the right third of the rectangle into the middle of the rectangle, then fold the left third in as well. Turn the dough 90° and gently press the dough into itself and form another rectangle.
Repeat this pattern of folding, turning, and pressing 2-3 more times and the dough will come together nicely and you’ll be able to see the difference. If at any point the dough starts to feel warm or your hands get oily from the butter starting to melt, place it into the refrigerator to keep the butter cold.
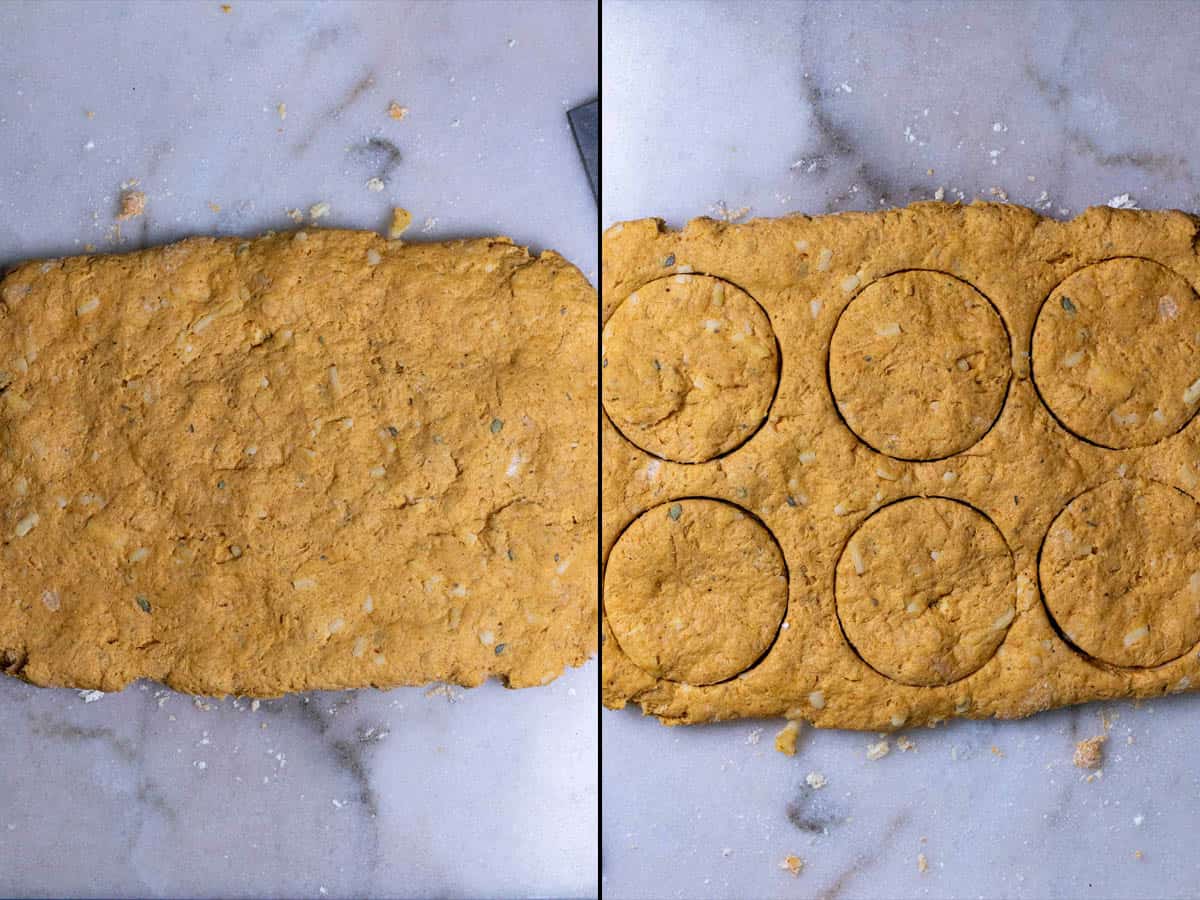
Form one final rectangle with the biscuit dough, about 1” thick. Using a 2 ½” biscuit cutter, start near one corner and push straight down through the dough and pull straight back up. Form the scraps into another rectangle and keep cutting biscuits until you run out of dough. Place the biscuits on a lined baking sheet and set in the refrigerator.
Preheat the oven to 450°F / 230°C and let the biscuits stay cold until the oven is ready.
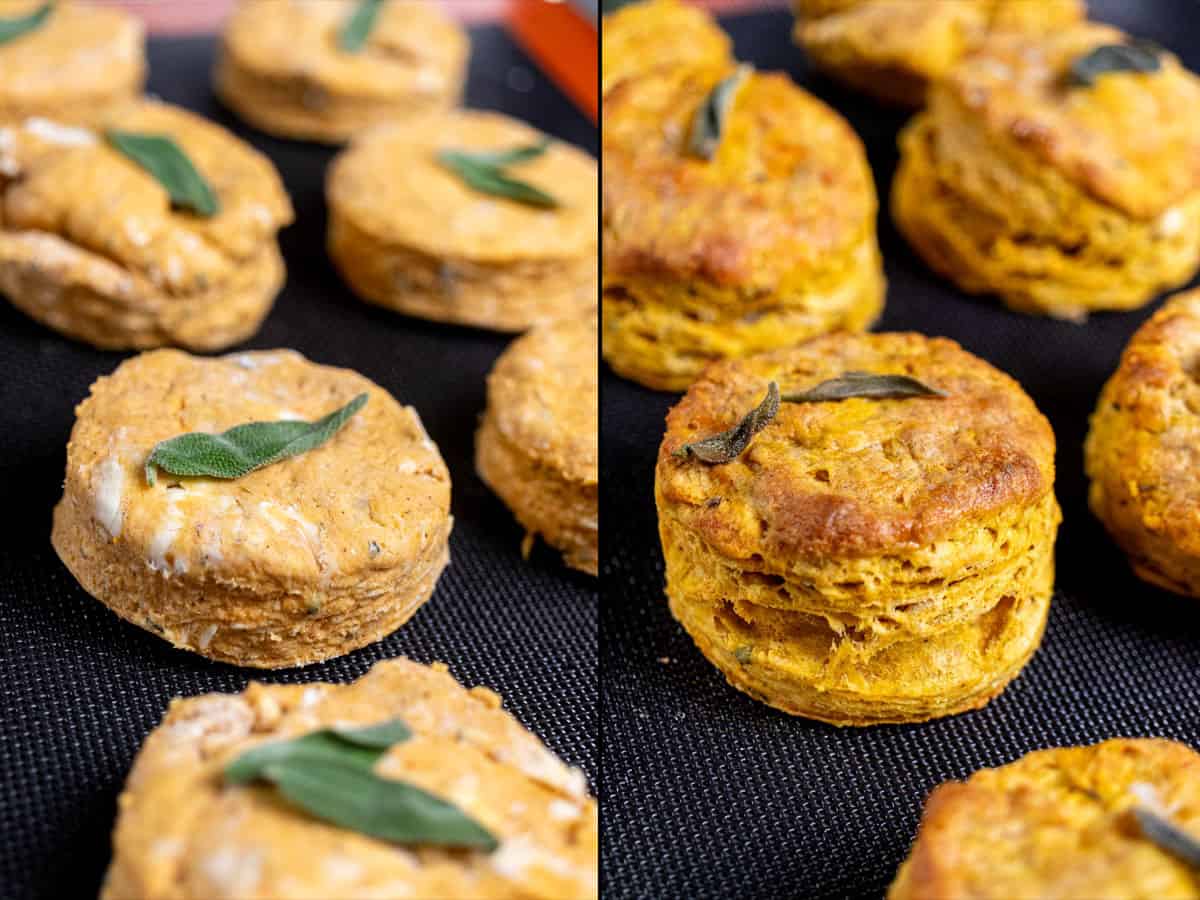
When the oven is ready, remove the biscuits from the cold and if you like, brush the tops of the biscuits with some buttermilk and gently press a sage leave into the top. Place on the middle rack and bake for 15-18 minutes, until the biscuits are puffy and golden brown.
While the pumpkin biscuits are baking, melt a few tablespoons of butter. As soon as the biscuits come out of the oven, brush the melted butter over the hot biscuits. Serve warm with some more butter, or honey-butter or maple-butter for even more flavor.
🍞 Tips for Flaky and Tender Buttermilk Biscuits
Keep Butter Cold – The butter for biscuits should always be cold until it goes into the oven. Like with pie crusts, the cold butter gets mixed with the flour and creates steam in the oven which puffs out the flour, creating flakiness. Keep the butter cold right up until you’re ready to add it to the flour mixture. When working the dough, if it starts to feel warm or your hands feel oily, place the dough back into the mixing bowl and set it in the fridge for a few minutes. Better to take a few extra minutes than end up with flat biscuits.
Using a pastry cutter/bench scraper for the folding also helps to keep the butter from getting warm too quickly. The warmth of your hands is plenty to melt butter, so limiting contact while working the dough keeps the butter colder for longer.
Don’t Overwork the Dough – Overmixing and overworking biscuit dough leads to dense and tough biscuits instead of the light and fluffy ones. This is why it’s important to just barely combine the wet and dry ingredients until it’s shaggy and not fully mixed. Using gentle pressure when pressing or rolling the dough into rectangles also helps. Avoid smashing things into shape or you’ll overwork the dough during the turning stages.

Fold the Biscuit Dough – The technique used here is a letter-folding version of lamination, but on a simpler scale. Whereas real lamination folds an entire layer of butter into the dough used for puff pastry and croissants, the butter here is already mixed into the flour. Doing a few folds and turns creates layers in the biscuit dough and helps them poof up when baked and keeps things fluffy and flaky. Just do the folds gently so that you’re not overworking the dough.
Don’t Twist – When using a biscuit cutter, it’s very important to press straight down through the dough and pull straight back up. If you press down and twist the cutter, it kind of “seals” the edges you cut. This causes the biscuits to not rise properly as they bake. Best case they’ll rise misshapen, worst case they will become quite dense.
📖 Variations
These were great as they were, but there’s a couple variations worth mentioning and trying as well if you want to switch things up with this pumpkin biscuit recipe.
Ingredients
Not Canned Pumpkin – Instead of using canned pumpkin puree, feel free to use your own homemade pumpkin puree. Alternatively, you can swap out the pumpkin for pureed sweet potato or make butternut squash biscuits. Both will have a similar taste and texture to the pumpkin for people that aren’t as big a fan of pumpkin.
Cheddar Sage Biscuits – If you’d like to add cheese to these biscuits, you can. Sharp cheddar and parmesan are good choices, and you can add about 1 cup to the recipe. Personally, I tried sharp white cheddar the first time I made these pumpkin sage biscuits, and I barely noticed it in there. I find the pumpkin and sage tends to overshadow any cheesy flavors, but feel free to experiment.
Herbs – I like the way pumpkin and sage go together here, but if you’re not a fan of sage you can leave it out. You can also try other herbs like rosemary, thyme, or tarragon. I do recommend fresh herbs over dried for pumpkin biscuits though.
Diets
Gluten Free Pumpkin Biscuits – Disclaimer here, I have not tried this specific recipe as gluten free, but it should be fine to make. You can use most gluten free 1:1 flour, and if the one you use doesn’t include xanthan gum, add about 1 teaspoon. The specific brand you use can change the recipe however, and you may need to use slightly more flour or buttermilk depending on the brand you prefer using.
Vegan Pumpkin Biscuits – Also not tested, but you can replace the butter with vegan butter and the buttermilk with unsweetened almond or oat milk. This works in other buttermilk biscuits, so it should be ok here as well. Add a teaspoon or two of lemon juice to the non-dairy milks as well. Also, be sure the sugar you use is vegan friendly.
💭 Frequently Asked Questions
Technically, no, but there’s a reason buttermilk works so well in biscuits. Other than the fat content in buttermilk and its signature tang, buttermilk also has an acidity level that’s lacking in other milks. This acidity works with baking powder and soda to create carbon dioxide that gives biscuits their rise.
If you use a different milk or cream, consider adding a bit of vinegar or lemon juice to boost the acidity of the liquid.
There are 3 main factors that contribute to fluffy and tall biscuits. A slightly acidic liquid working with the baking powder and soda, a high oven temperature for that initial oven spring that causes the water in butter to turn to steam and keep the butter nice and cold.
Cold butter doesn’t mix with the flour as easily, and these pockets of cold butter create steam in the oven which puffs up the layers of flour as it cooks. When the butter gets warm or melts prematurely, the flour will absorb the water content, leading to more gluten formation and less steaming action. This is why biscuits sometimes don’t rise nice and fluffy and have a dense texture.
You don’t have to, but I think it’s a good idea to do so. No matter how hard you try not to overmix the dough or let the butter melt, you’ll still end up forming gluten and getting the butter a little warm. Refrigerating the dough while the oven heats up gives the gluten time to relax some and lets the butter reharden and get cold again.

🍽 Equipment
Making these easy pumpkin sage biscuits really only requires basic kitchen tools you likely already have, but there’s items I’d like to mention here really quickly.
Bench Scraper – Whether you call it a bench scraper, bench knife, pastry cutter, etc., this simple tool is useful for a variety of applications. Here, a decent bench scraper helps with folding the biscuit dough because it limits how much you need to use your hands, which are warm enough to start melting the butter.
Biscuit Cutter – Having a set of biscuit cutters of various sizes is a good idea if you do a lot of biscuit making, and they can double as cookie cutters as well. If you don’t make biscuits that often and don’t want another kitchen tool, you can try using cups or glasses that have a 2-3” round opening. Alternatively, you can also use a sharp knife to cut the biscuit dough and make square biscuits or use an ice cream scoop and make pumpkin sage drop biscuits instead.

❄️ Storage
Pumpkin sage biscuits, like almost all biscuits, are best when eaten hot and fresh. If you have leftovers that you would like to store, however, there’s a few options.
You can store leftovers in an airtight container at room temperature for about 2 days. For longer storage, you can refrigerate leftovers in an airtight container for about a week. They can also be frozen for 2-3 months. If freezing, it’s best to wrap the biscuits in plastic wrap and then again in aluminum foil.
These can also be made ahead of time and frozen. Make them as directed up to the point they’re ready to be baked. Instead of baking, place the cut biscuits on a sheet pan and place into the freezer for a few hours. Once frozen, transfer the biscuits to a zipper locked bag and freeze for up to 2-3 months. Bake directly from frozen, adding around 5 more minutes to the bake time.
📋 Recipe
Pumpkin Sage Buttermilk Biscuits
Ingredients
- 2 ½ cups all-purpose flour
- 1 tablespoon baking powder, preferably aluminum-free
- ¼ teaspoon baking soda
- 1 teaspoon salt
- ¼ teaspoon black pepper
- ½ teaspoon ground cinnamon
- ¼ teaspoon ground nutmeg
- ¼ teaspoon ground cloves
- 2 tablespoons finely chopped fresh sage
- ⅓ cup buttermilk
- ¾ cup pumpkin puree
- 1 tablespoon brown sugar, packed
- ½ cup butter, cold
Directions
- One of the tricks for flaky biscuits is using cold butter, so keep the butter in the fridge or freezer until you need it.
- In a large mixing bowl, combine 2 ½ cups all-purpose flour, 1 tablespoon baking powder, ¼ teaspoon baking soda, 1 teaspoon salt, ¼ teaspoon black pepper, ½ teaspoon ground cinnamon, ¼ teaspoon ground nutmeg, ¼ teaspoon ground cloves, and 2 tablespoons finely chopped sage. Whisk to thoroughly combine and distribute the ingredients, then set it aside.
- Measure ⅓ cup buttermilk in a 2-cup liquid measuring cup, then add ¾ cup of pumpkin puree and 1 tablespoon of brown sugar. Stir or whisk the ingredients until smooth and fully combined.
- Now take out the ½ cup of cold butter and grate it directly into the flour mixture. Alternatively, you can cut the butter into cubes and use a food processor, pastry blender, or forks to work the butter into the flour.
- Pour the wet mixture into the flour-butter mixing bowl and using a rubber spatula or your hands, work the dough together until just barely combined. It should look shaggy and kind of dry still, that’s normal.
- Turn out the dough onto a floured work surface or pastry mat and gently press into a rectangle about 1” thick. Use a pastry cutter/bench scraper or your hands to fold the right third of the rectangle into the middle of the rectangle, then fold the left third in as well. Turn the dough 90° and gently press the dough into itself and form another rectangle.
- Repeat this pattern of folding, turning, and pressing 2-3 more times and the dough will come together nicely and you’ll be able to see the difference. If at any point the dough starts to feel warm or your hands get oily from the butter starting to melt, place it into the refrigerator to keep the butter cold.
- Form one final rectangle with the biscuit dough, about 1” thick. Using a 2 ½” biscuit cutter, start near one corner and push straight down through the dough and pull straight back up. Form the scraps into another rectangle and keep cutting biscuits until you run out of dough. Place the biscuits on a lined baking sheet and set in the refrigerator.
- Preheat the oven to 450°F / 230°C and let the biscuits stay cold until the oven is ready.
- When the oven is ready, remove the biscuits from the cold and if you like, brush the tops of the biscuits with some buttermilk and gently press a sage leave into the top. Place on the middle rack and bake for 15-18 minutes, until the biscuits are puffy and golden brown.
- While the pumpkin biscuits are baking, melt a few tablespoons of butter. As soon as the biscuits come out of the oven, brush the melted butter over the hot biscuits. Serve warm with some more butter, or honey-butter or maple-butter for even more flavor.


Nico
Absolutely scrumptious, and while it took a bit longer to prep than the recipe suggested it was all very straightforward & the end result was exactly as I’d anticipated / hoped it would be. Thank you for sharing this recipe!
Chris Pezzana
Thank you so much for the comment, I’m glad the biscuits came out as you’d hoped they would be!
Prep time is such a difficult thing to judge since people work at different paces. If I have to remake and test a recipe multiple times until I’m happy with it, after a few times I’ve memorized the process and move faster than someone would making them for the first time. When I have to stop and take process photos though, recipes take me 3-4x longer than they should. Reading through the directions, I may tweak the prep time up another 5-10 minutes though. Thank you for the head’s up on that.