
A winter citrus perfect for creating a dessert out of, blood oranges have a unique and dramatic color and flavor that’s ideal for creating a “wow” factor when serving to friends and family. Combined with the flavor and color deepening effect of hibiscus petals, the blood orange curd tastes like a Dreamsicle with a hint of raspberry.
I’ve made lemon curd a number of times but was looking for something more uniquely winter to create a dessert with. The inspiration actually came from a wintertime cocktail I’ve made in the past while bartending: a blood orange Cosmo. Replacing the cranberry juice with fresh blood orange juice, then squeezing a blood orange peel and igniting the oils over the drink in front of the guest always felt kind of badass. I wanted to make a dessert with that similar appeal of both flavor and aesthetic that would make someone say “wow” when they tried it.
When to Find Blood Oranges
There are three distinct varieties of blood oranges: the Moro, the Sanguinelli, and the Tarocco. The Moro are a good size and have the deepest color and are the type I used for the blood orange hibiscus tart. The Sanguinelli are slightly smaller with a somewhat elongated shape. They have a similar taste and color to the Moro. Finally, the Tarocco blood orange is slightly sweeter than the others but has a much more muted color. The inside tends to range from yellow to orange to red in a pretty, but less dramatic hue.
I managed to find blood oranges in all the main grocery stores of my town, so you shouldn’t need to look for a specialty store to find them. Your exact location may differ in availability, but typically the Moro variety is available from December through March, Sanguinelli are available February through May, and the Tarocco are available January through May.

Why Hibiscus and Do I Need It?
Short answer? No, you can completely omit it if you’d prefer. So why use it at all? When people describe the flavor of a blood orange it’s typically, “tart and slightly sweet, with floral notes and a hint of raspberry.” When people describe the flavor of hibiscus it’s usually, “tart with floral notes and a hint of cranberry or pomegranate.” Basically, the flavor of hibiscus helps enhance the natural flavor of the blood oranges. Whenever I cook with Guinness, I like to add a little bit of cocoa and espresso powder as well, because they help enhance the natural flavors in Guinness. Same concept here.
Another reason to use hibiscus is the similarity in color. Whenever making a curd out of something besides lemons, the sheer amount of egg yolks involved tends to muddle the natural color of other fruits. Letting the curd mixture steep with the hibiscus petals helps to retain and enhance the natural color provided by the blood oranges.
Ingredients for a Blood Orange Hibiscus Tart
I say ingredients for a blood orange hibiscus tart, but this list is actually for a blood orange curd. The tart shell you use is completely up to you. Feel free to use a store-bought shell or pie dough, or make your own gluten-free almond tart, or a crumbled cookie/graham cracker crust. For this recipe I made a sweet tart dough, or Pâte Sucrée. It’s the perfect middle ground between a flakey pie crust and a buttery sugar cookie.

Butter – Unsalted, cold, and cubed, the butter adds a velvety richness to the flavor and texture, as well as helping the finished curd set.
Blood Orange Zest – A little zest goes a long way in adding a pop of flavor.
Blood Orange Juice – The main source of color and flavor, you’ll need to juice 5-8 blood oranges to get a full cup. The amount you need will depend on how large and juicy the ones you’re able to find are.
Lemon Juice – You can omit this if you wish, but just a ¼ cup from one lemon adds a splash of brightness and tangy acidity.
Hibiscus – Depending on where you live, this can be a little more difficult to find. I only managed to find straight hibiscus tea without other flavoring from one grocery store here. I suggest buying online as it’s cheaper in the long run. I bought whole petals and chopped them up myself.
Sugar – Granulated white sugar adds sweetness.
Eggs – A mix of whole eggs and egg yolks helps to thicken the curd and allow it to set properly.
How to Make a Blood Orange Hibiscus Tart
Start by par baking your crust until it’s almost cooked through and set aside to cool.
Preheat your oven to 325°F / 165°C (or lower the temperature to 325°F if you just cooked the tart shell).
Zest 1-2 blood oranges until you have 1 tablespoon of zest. Slice or cube 8 tablespoons (1 stick) of butter. Add the zest and butter to a medium size pot or heatproof mixing bowl and set aside.
Juice the blood oranges and lemon over a strainer to catch any seeds.
Add the eggs and yolks, salt, and sugar into a medium saucepan, set over low heat and whisk together until smooth and the sugar has dissolved.

Combine the blood orange and lemon juices and slowly pour into the egg mixture while whisking until fully incorporated. Add in the hibiscus petals and stir until they’re fully coated and submerged as much as you can.
Cook on low to medium-low heat, stirring almost constantly, until the curd mixture coats the back of a spoon. You want to cook it until it registers between 165-170°F / 74-77°C. Normally this would only take a little over 10 minutes at medium-low heat, but I wanted to give the hibiscus more time to steep, so I kept adjusting the heat so that it took about 20 minutes to reach temperature.
Once the curd is cooked, remove from the heat, and pour through a strainer over the reserved butter and blood orange zest. The cold butter will help stop the curd from cooking and melt into it. Use a spatula to press the curd through the strainer and get as much as you can.
Whisk to combine until you no longer see any pieces of butter and the zest is well mixed without any clumps. Pour the curd mixture into the prepared tart shell and place in your oven.

The cook time will depend on your oven and how set or runny your curd is. Allow at least 18-26 minutes, but start checking around 15 minutes in. It will be done when it no longer looks wet, and the outside looks a little puffy and the center wobbles like jelly (kind of like cheesecake). Remove from the oven when it’s ready and allow to cool to almost room temperature before placing in the fridge. Let it continue to cool and set for at least 3 hours or overnight before decorating and serving.
How to Serve and Store Blood Orange Tart
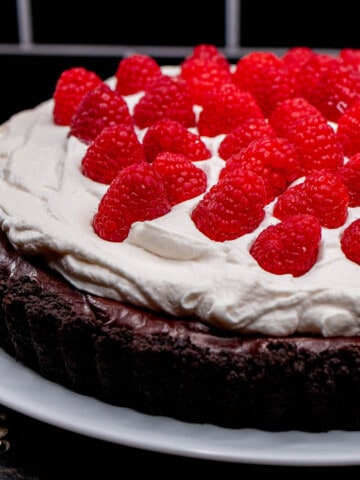
Once the tart has chilled enough, you can remove it from the tart pan and decorate it however you like. Leaving it as is works, but some added whipped cream gives it a great flavor. The one I made in this recipe utilizes homemade stabilized whipped cream that I piped on for decoration. Store bought or homemade regular whipped cream works just as well, or even cool whip from the freezer section.
You can also slice an extra blood orange or two and remove the rind for an edible decoration like shown in the photos, or even candied blood orange pieces.
The finished blood orange hibiscus tart can be covered and refrigerated for 4-5 days, but the tart shell will begin to soften after the first 2-3 days.
If you wish to prolong the life of the curd, you can make it up to the point before adding it to the tart shell. Allow it to cool completely and transfer to an airtight container like a mason/canning jar and it will last up to 1-2 weeks in the refrigerator, or up to an entire year in the freezer.

📋 Recipe

Blood Orange Hibiscus Tart
Ingredients
- 1 9-inch pre-baked Pâte Sucrée tart shell, or tart crust of choice
- 8 tablespoons unsalted butter, (1 stick) cold and cubed
- 1 tablespoon blood orange zest
- 4 large eggs
- 2 large egg yolks
- 1 cup granulated sugar
- ¼ teaspoon salt
- 1 cup blood orange juice, strained
- ¼ cup lemon juice, strained
- ½ cup cut hibiscus petals
Directions
- Start by par baking your crust until it’s almost cooked through and set aside to cool. Check the recipe for my sweet tart dough for the tart shell I used here.
- Preheat your oven to 325°F / 165°C (or lower the temperature to 325°F if you just cooked the tart shell).
- Zest 1-2 blood oranges until you have 1 tablespoon of zest. Slice or cube 8 tablespoons (1 stick) of butter. Add the zest and butter to a medium size pot or heatproof mixing bowl and set aside.
- Juice and strain 5-8 blood oranges until you have 1 cup, and juice and strain 1 lemon until you have about ¼ of a cup. Set aside.
- Add the 4 eggs and 2 egg yolks, ¼ teaspoon of salt, and 1cup of sugar into a medium saucepan, set over low heat and whisk together until smooth and the sugar has dissolved.
- Combine the blood orange and lemon juices and slowly pour into the egg mixture while whisking until fully incorporated. Add in the ½ cup of hibiscus petals and stir until they’re fully coated and submerged as much as you can.
- Cook on low to medium-low heat, stirring almost constantly, until the curd mixture coats the back of a spoon. You want to cook it until it registers between 165-170°F / 74-77°C on an instant-read thermometer. Normally this would only take a little over 10 minutes at medium-low heat, but I wanted to give the hibiscus more time to steep, so I kept adjusting the heat so that it took about 20 minutes to reach temperature.
- Once the curd is cooked, remove from the heat, and pour through a strainer over the reserved butter and blood orange zest. The cold butter will help stop the curd from cooking and melt into it. Use a spatula to press the curd through the strainer and get as much as you can.
- Whisk to combine until you no longer see any pieces of butter and the zest is well mixed without any clumps. Pour the curd mixture into the prepared tart shell and place in your oven on the center rack.
- The cook time will depend on your oven and how set or runny your curd is. Allow at least 18-26 minutes, but start checking around 15minutes in. It will be done when it no longer looks wet, and the outside looks a little puffy and the center wobbles like jelly (kind of like cheesecake). Remove from the oven when it’s ready and allow to cool to almost room temperature before placing in the fridge. Let it continue to cool and set for at least 3hours or overnight before decorating and serving.
- Once the tart has chilled long enough, you can remove it from the tart pan and decorate how you’d like and serve immediately.
Equipment Used
Notes
Nutrition


Comments
No Comments