


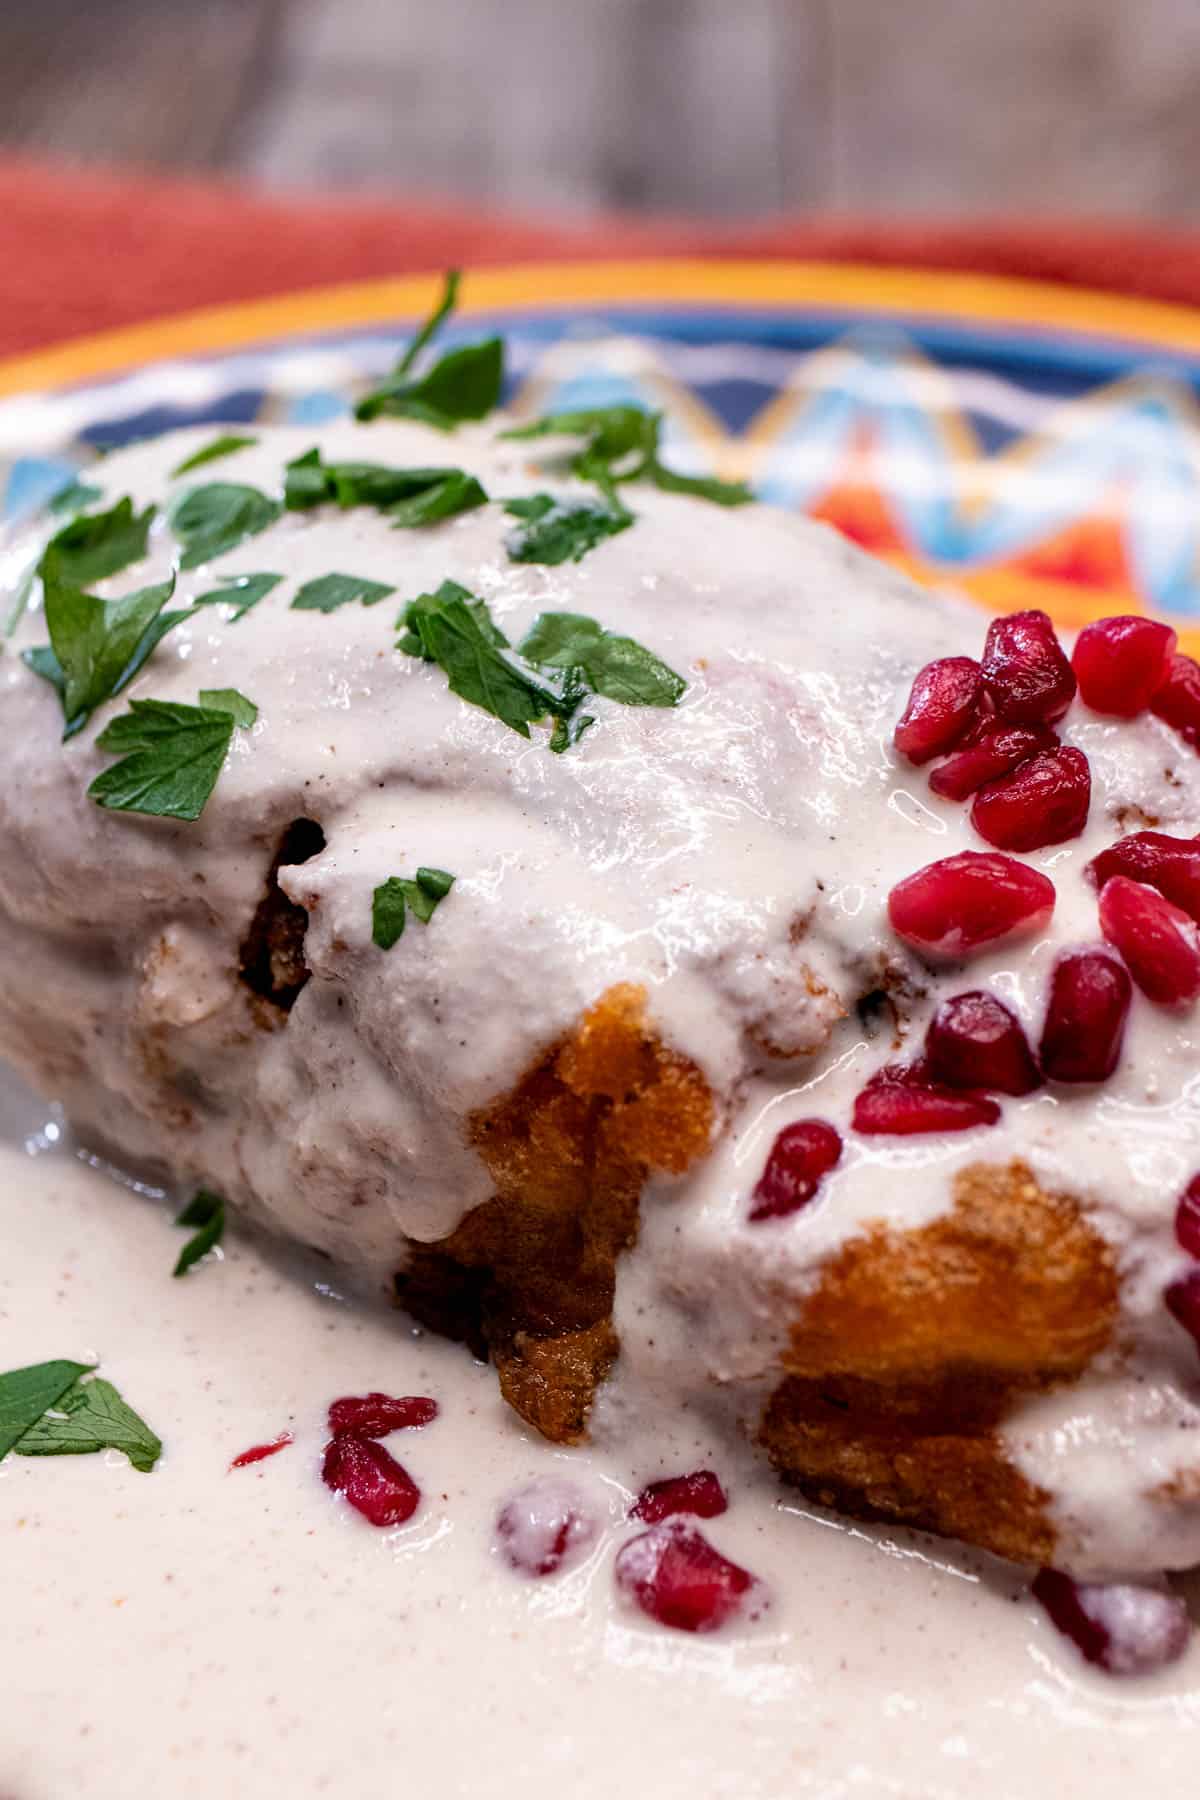
Widely considered a national dish of Mexico, chiles en nogada celebrate Mexican independence with a stuffed poblano covered in a walnut sauce. This dish is a celebration with amazing flavors of in-season fruits and nuts and beautiful colors.
At its heart, chiles en nogada is basically a chile rellenos without cheese that is stuffed with a sweet and savory picadillo. Made with in-season ingredients such as apple, pear, peach, walnuts, and pomegranate, this Mexican dish was first made in Puebla, Mexico in 1821.
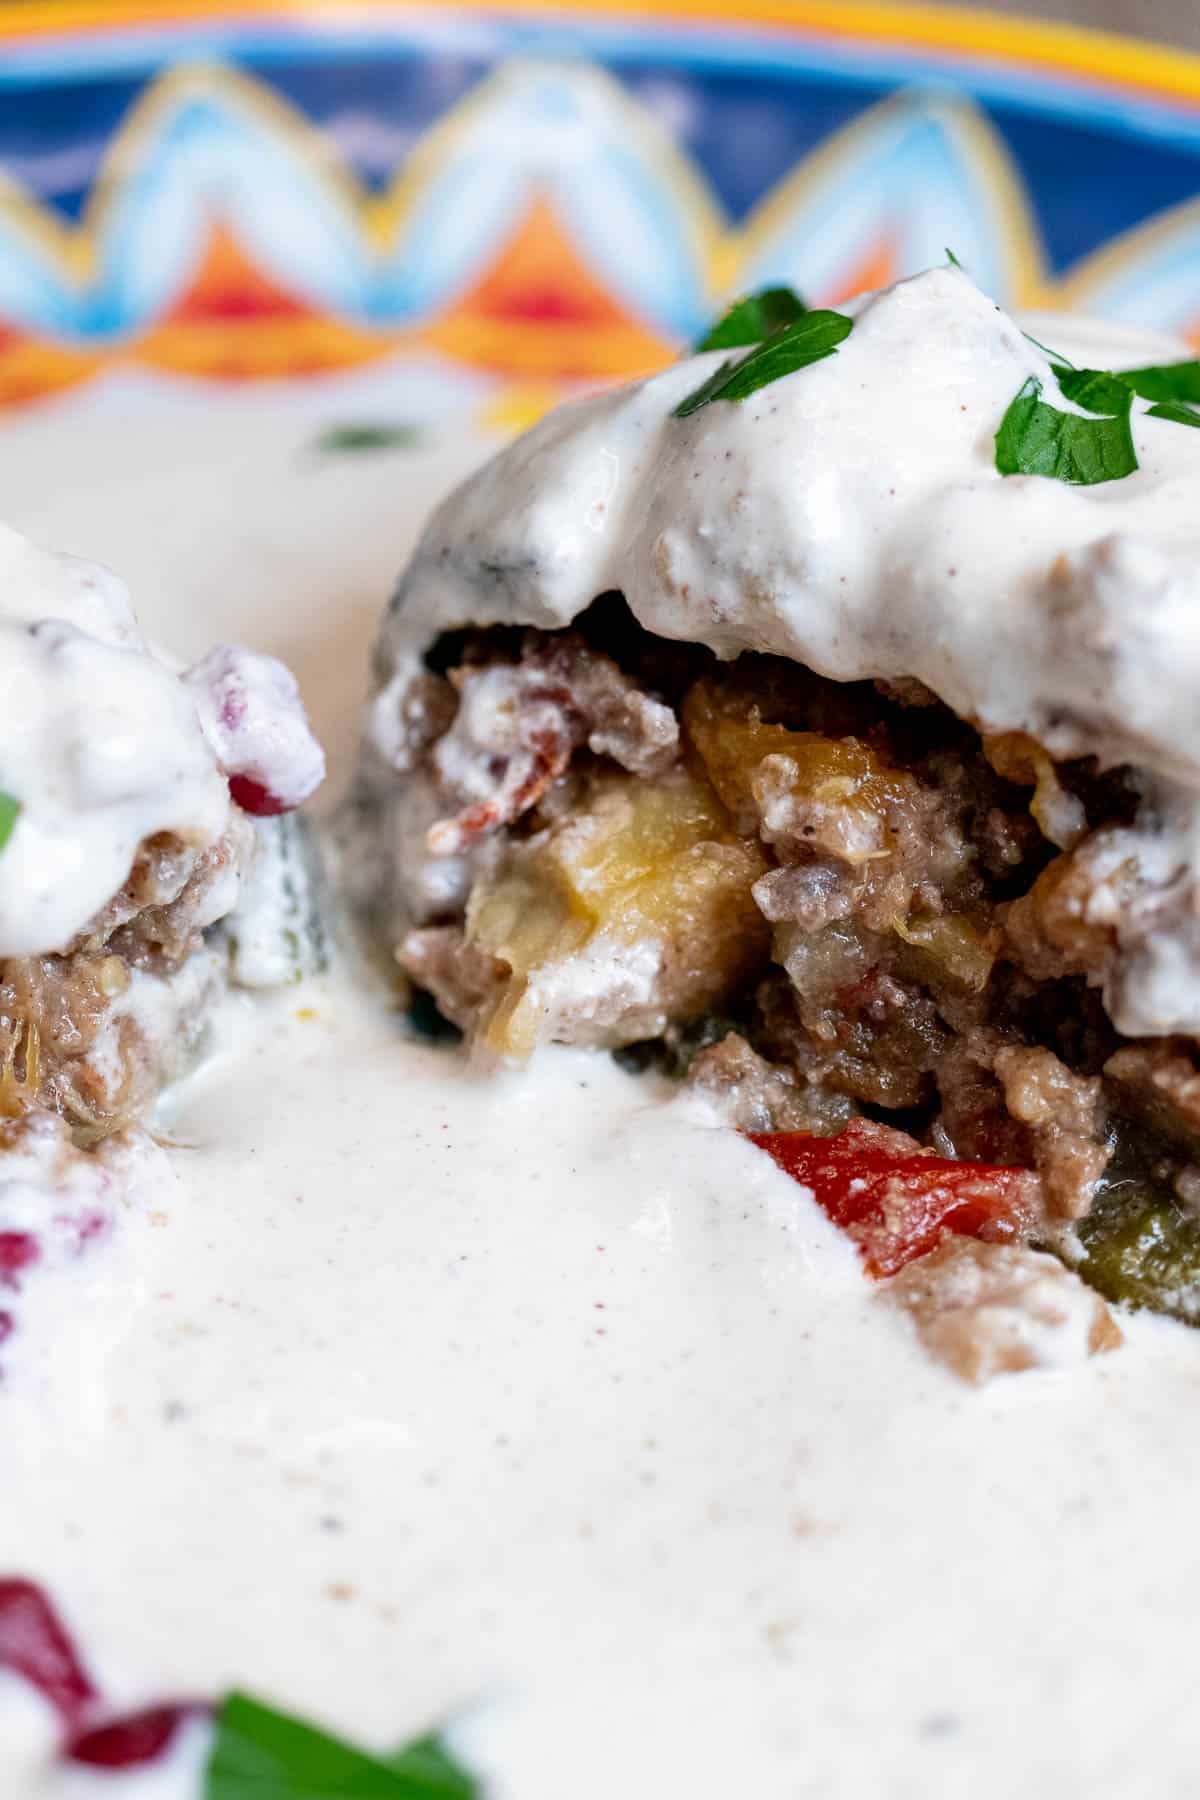
My first time trying this dish, I had no idea if I would like it or not. Turned out to be incredibly delicious and filling. The combination of meats, fresh fruits, dried fruits, and nuts gives chiles en nogada a sweet and savory flavor with pops of sweetness from the variety of fruits and texture from the nuts. The walnut sauce is creamy and slightly sweet, and the pomegranate seeds give pops of tartness to balance everything.
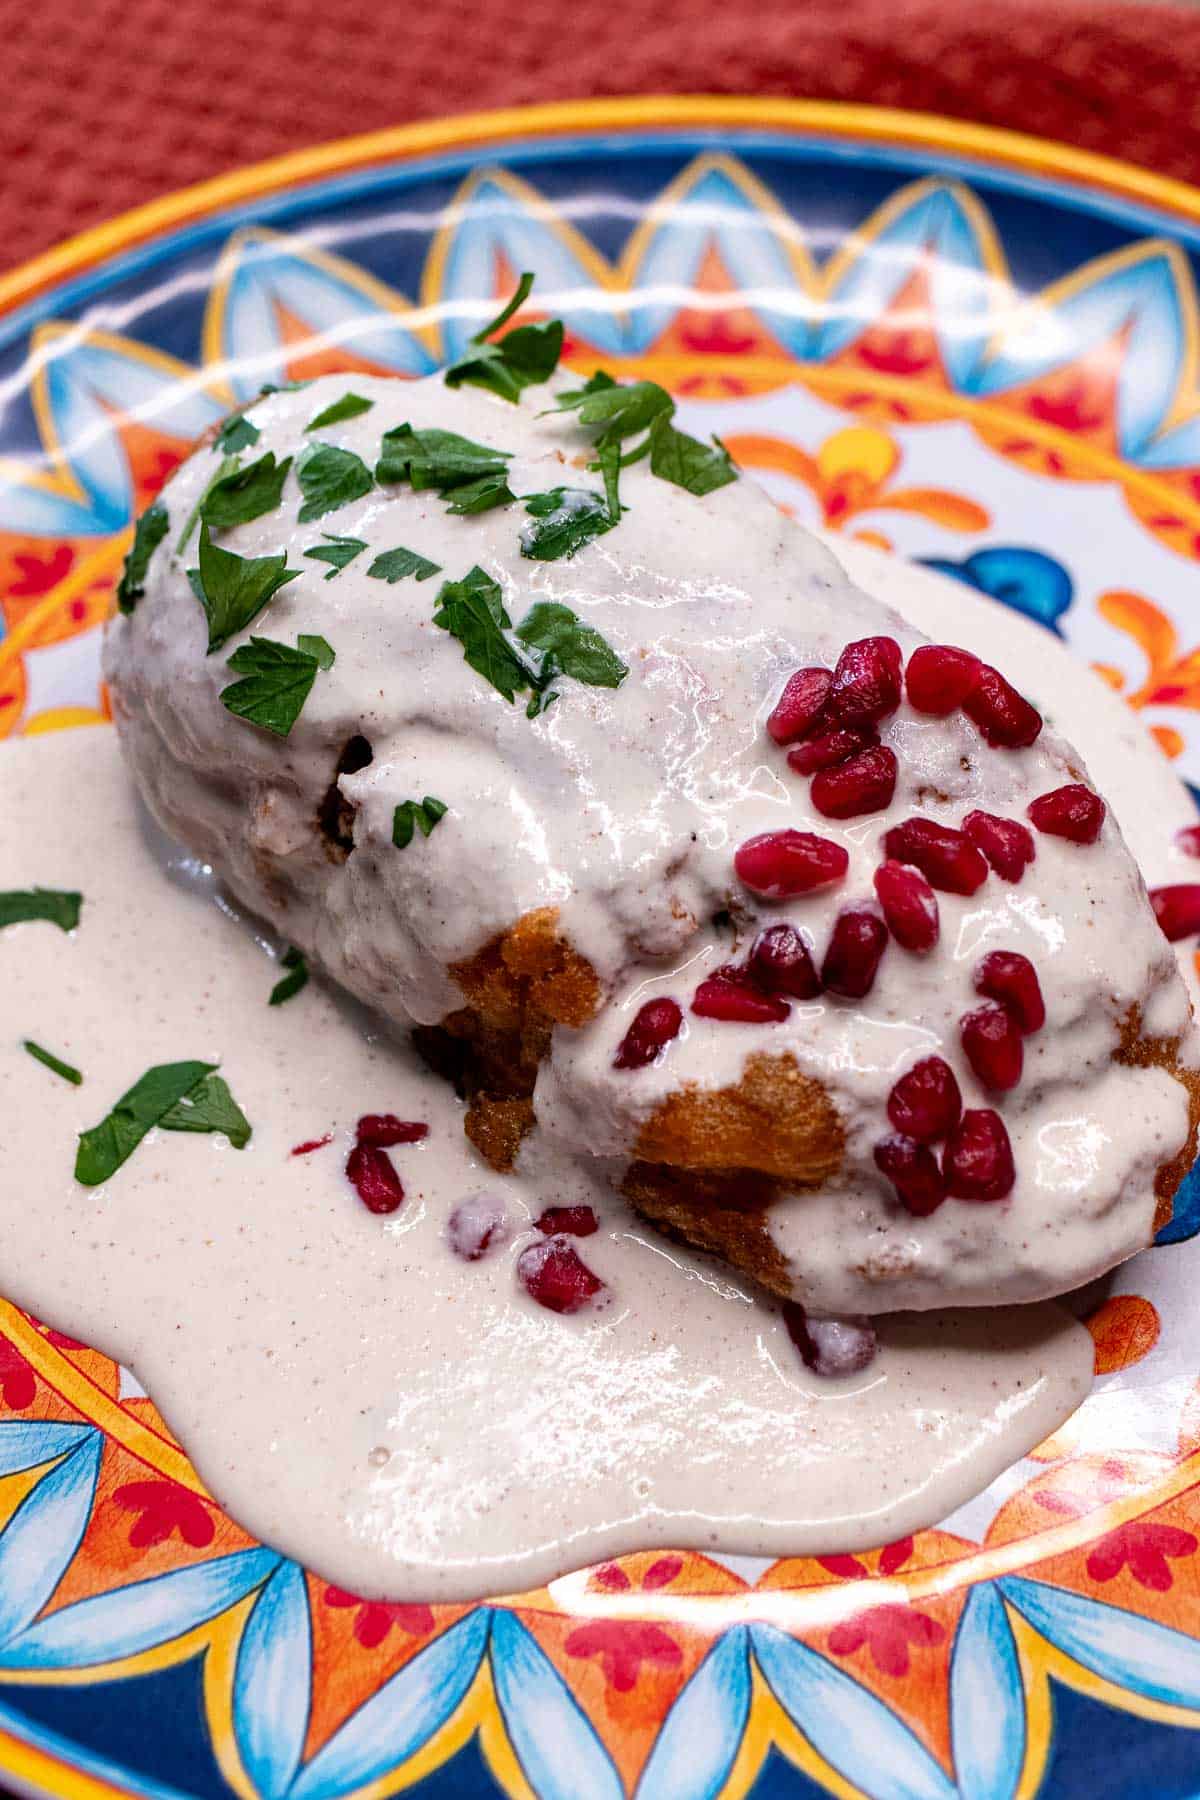
Chiles en nogada are also a labor of love with a lot of ingredients and steps. Thankfully, the ingredients aren’t difficult to find, and I’ll list substitutions and tips and tricks below for an easier experience. This is also a recipe that’s great to get the whole family involved if you can. You can also break the recipe up into a 2-day process if needed.
Jump to:
🥘 Ingredients for Chiles en Nogada
This recipe has a lot of ingredients and steps, so I break them into 3 sections: the walnut sauce, the filling, and the poblano peppers and toppings.
The Nogada (Walnut Sauce)
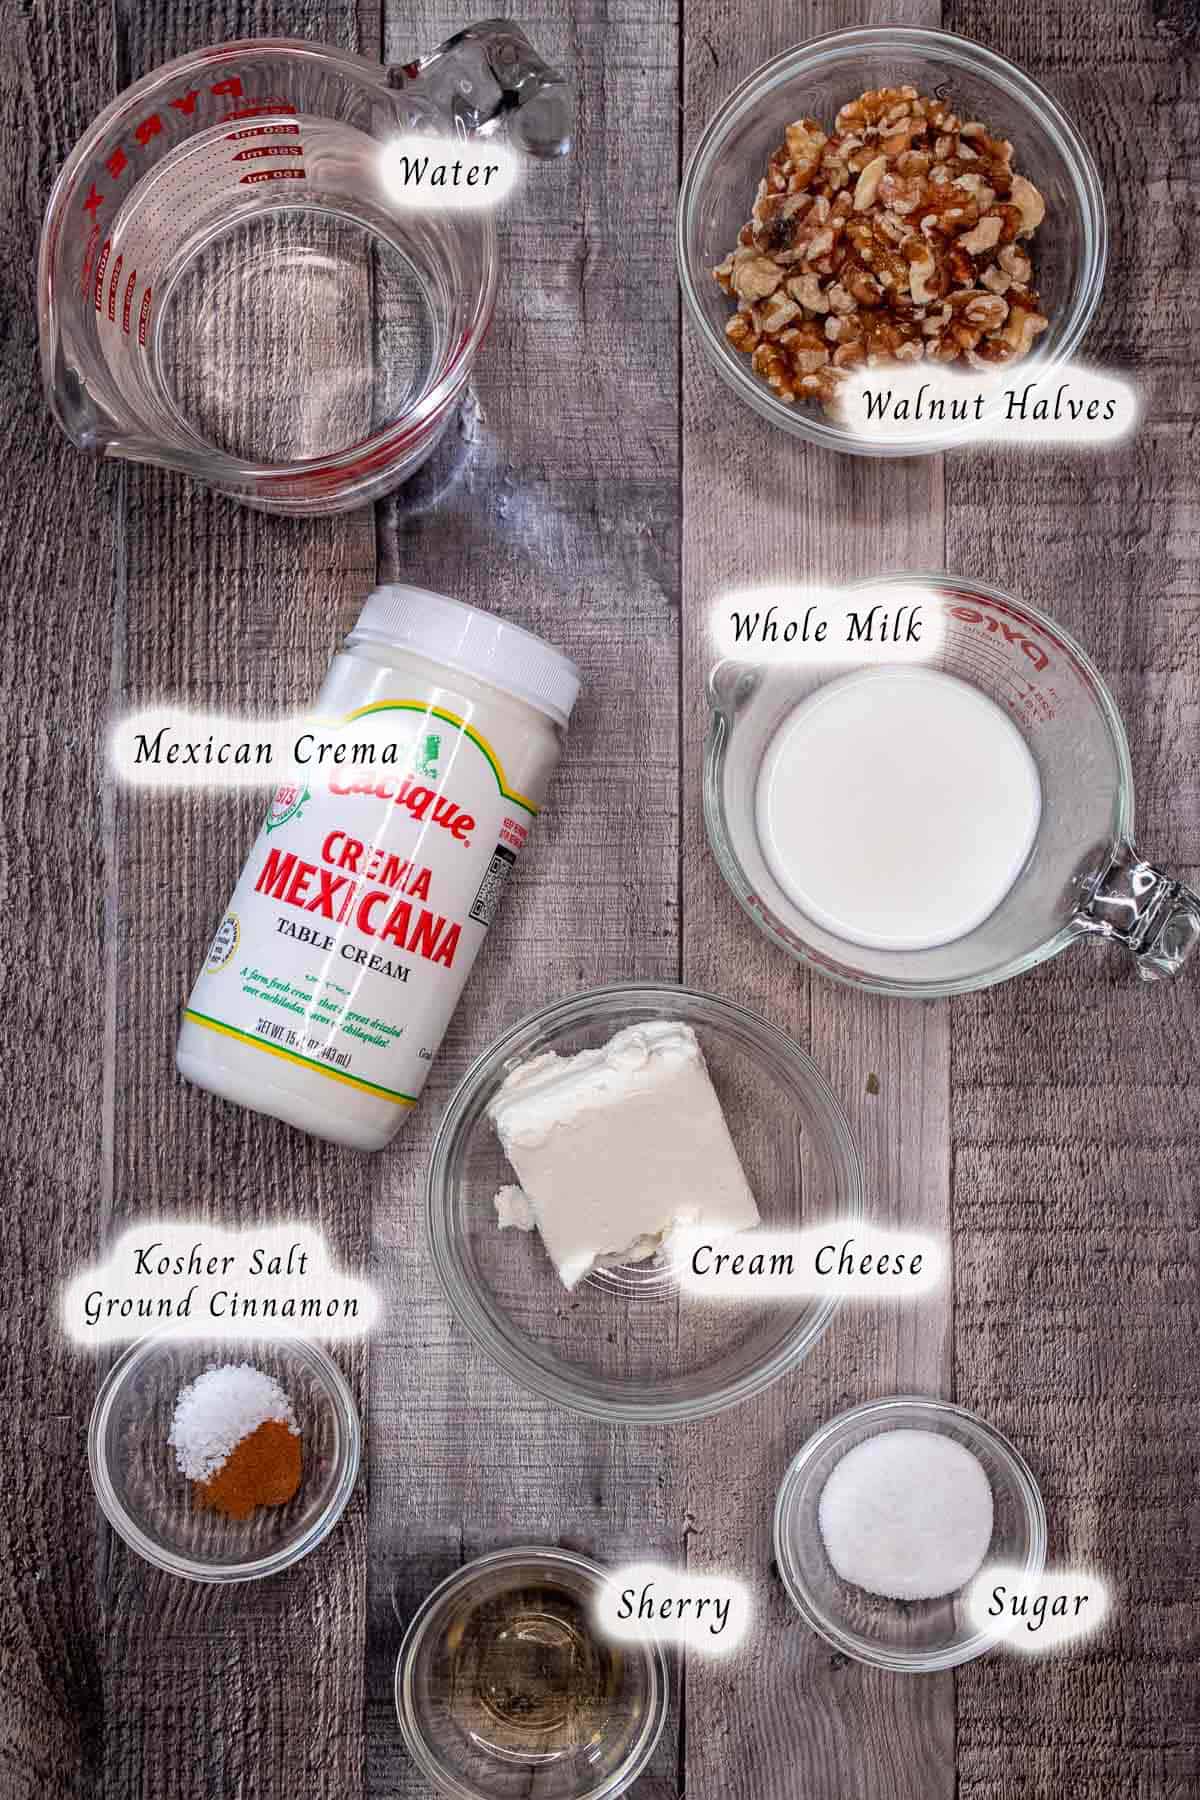
Walnuts – The traditional nut for the sauce are walnuts. I recommend getting walnut halves and soaking them in hot water to more easily remove their skin. While you can skip this step, the sauce will be bitter if you don’t. Alternatively, you can buy them online already skinned as well. If you don’t like walnuts, you can also use pecans, skinned almonds, or a combination.
Milk – Use milk for the base of the sauce other than the walnuts. I prefer whole milk, but almost any milk will be fine.
Cheese – The traditional ingredient here is goat cheese, sometimes combined with cream cheese. You can also use just goat cheese, cream cheese, queso fresco, or a combination you prefer.
Cream – For this you can use Mexican crema or heavy cream. You want a fatty dairy that helps thicken the sauce though.
Sugar – A bit of white sugar helps to sweeten the walnut sauce. This can be optional, and I usually use just a bit, but you can adjust this to your taste.
Cinnamon – Optional, but a small bit of cinnamon helps to flavor the sauce.
Sherry – Also optional, a little sherry wine helps to flavor the sauce, and I use some in the filling also.
The Filling
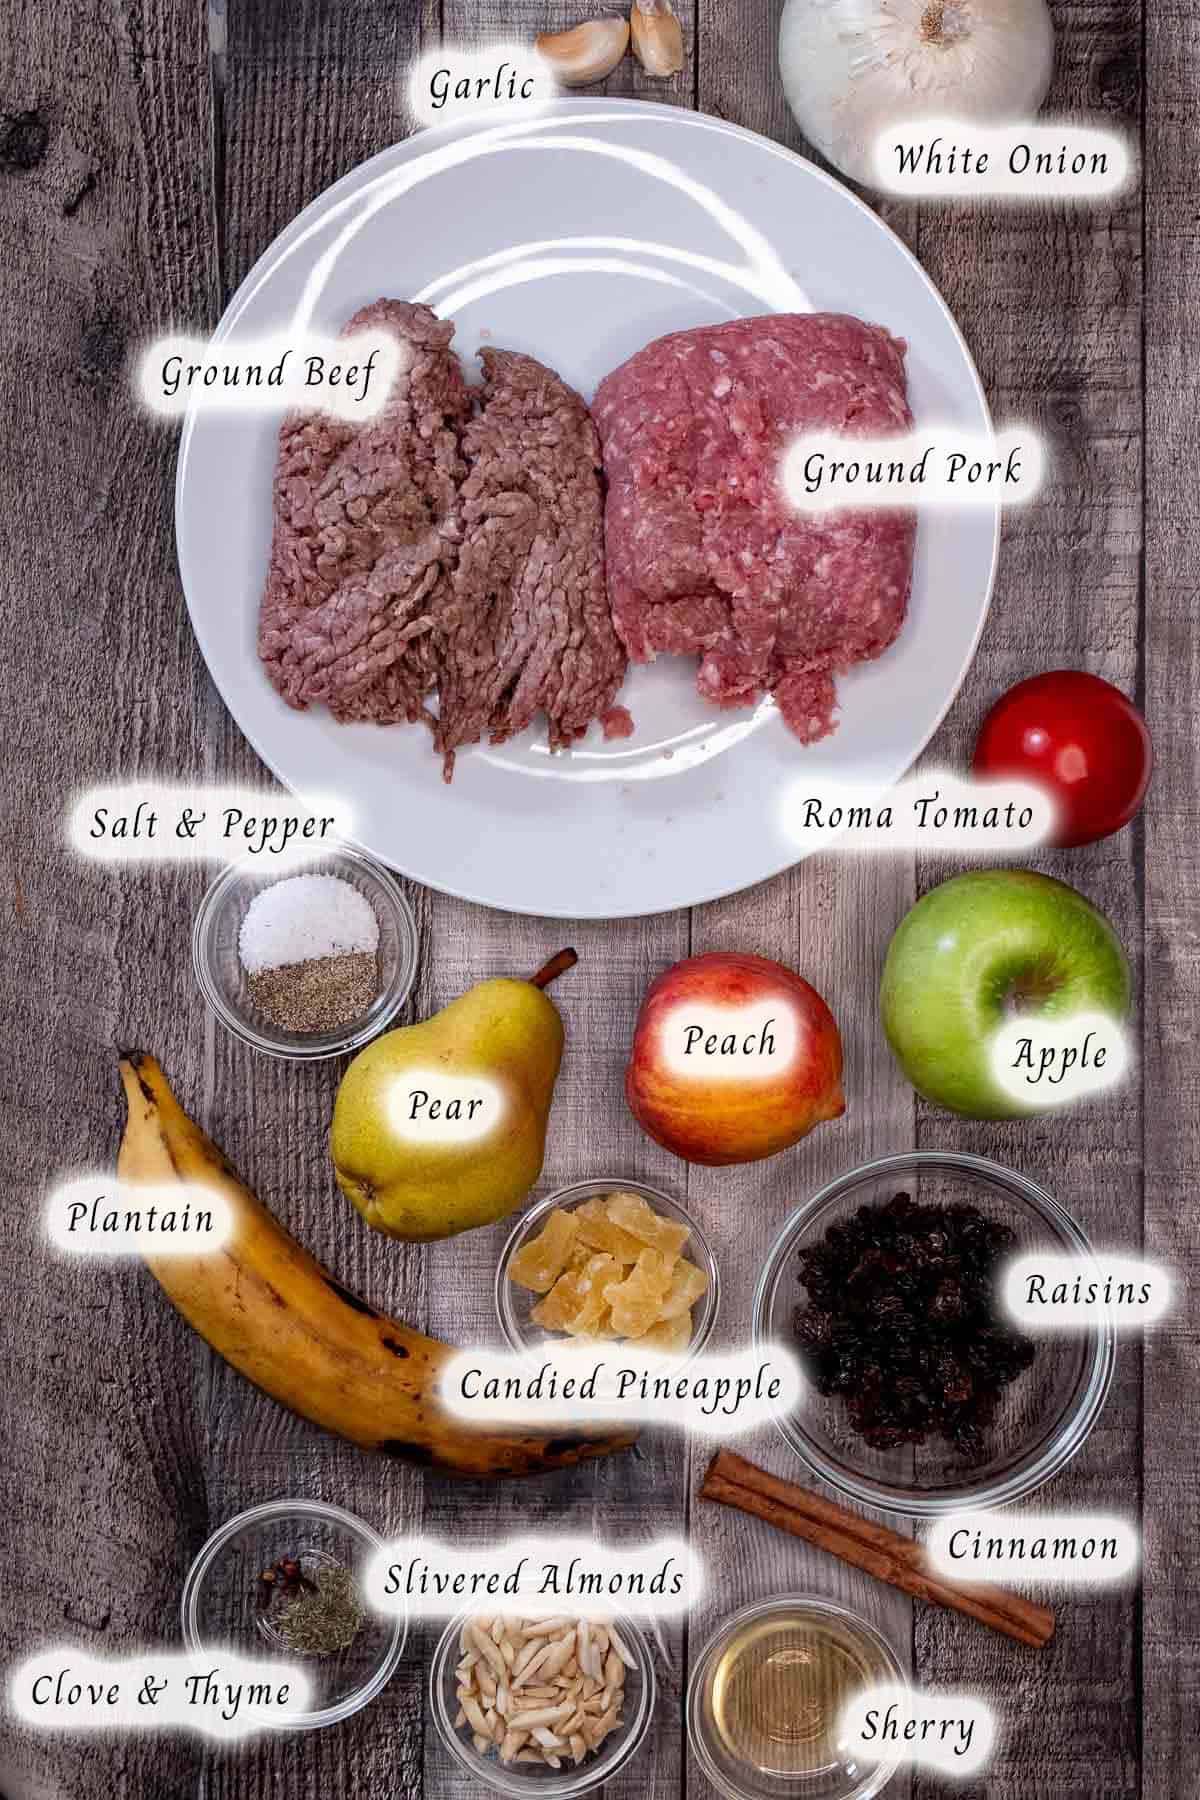
Meat – Most modern recipes use a combination of ground beef and ground pork, which I also use here. The combination gives a great flavor, and I usually look for an 80/20 or 85/15 blend for the beef.
Vegetables – Use a combination of white onion, garlic, and tomatoes here. I use fresh Roma tomatoes, but you can also blend Roma tomatoes or use canned, diced tomatoes or even tomato sauce.
Fresh Fruit – The classic combination uses fresh, in-season fruits that include apple, peach, pear, and plantain. For apples, use varieties you would use in baking that can hold their shape when cooked, such as Granny Smith, Honeycrisp, Gala, etc. As for peaches, look for firm, yellow, clingstone varieties that hold up to cooking. The best options for pears include Bosc and Anjou, or Bartletts that are still a bit green and firm and not fully ripened. Look for yellow plantains with a bit of blackening but avoid green plantains or yellow plantains with a ton of blackening.
Dried Fruit – Raisins, either regular or golden are used here. The original recipe used candied cactus, but most modern recipes (including this one) use dried pineapple or apricot.
Nuts – I use slivered almonds here, but you could also use more walnuts, pecans, pine nuts, and combinations of all of them.
Seasoning – Use salt and ground pepper with the meat, then after adding the other ingredients use things like ground cinnamon, clove, and thyme. Some recipes include a bit of ground nutmeg and marjoram as well.
Sherry – Optional again, but I also include a bit of sherry wine in both the filling and the walnut sauce.
The Poblanos
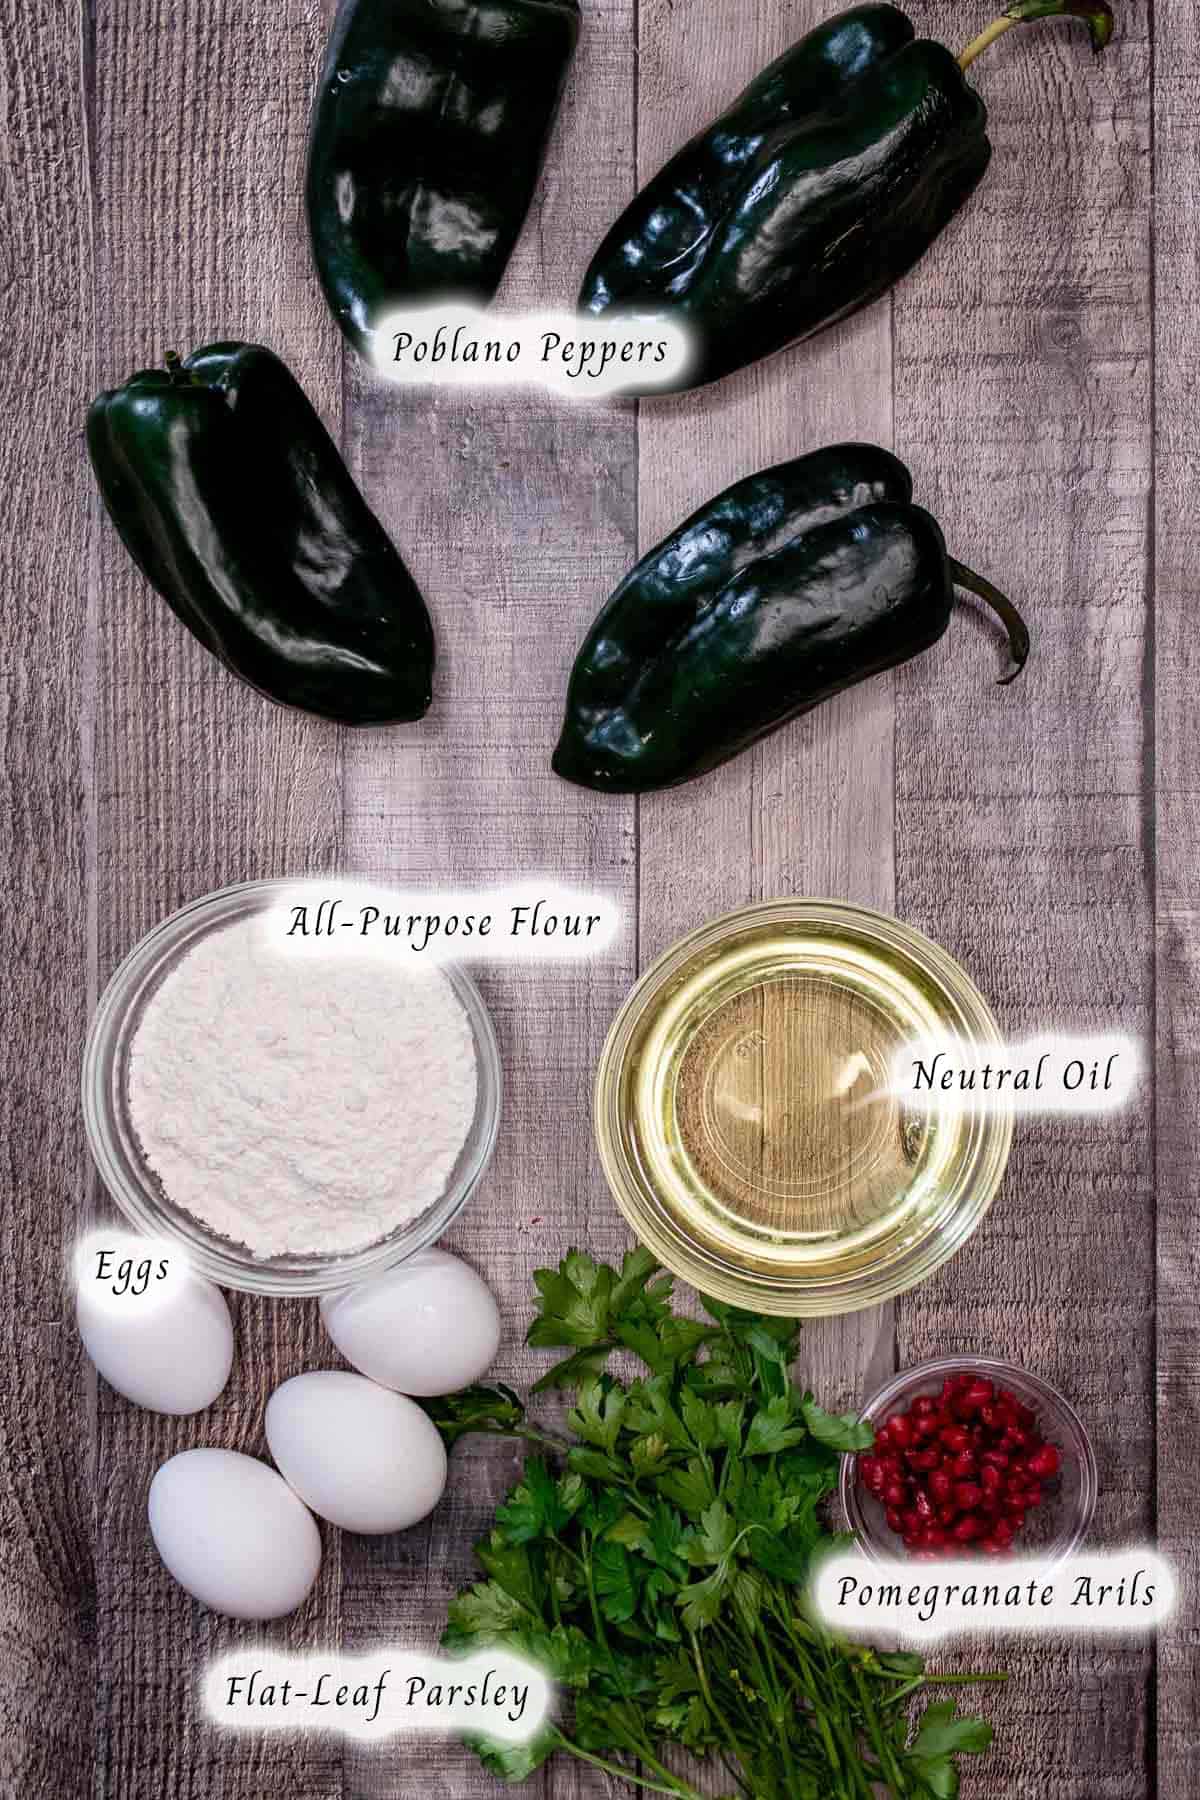
Poblano Peppers – Depending on their size, you should have enough for filling for at least 6-8 poblano peppers. These should be roasted black with the skin removed. You’ll then make a small slit and remove the core and seeds before filling them.
Flour & Eggs – This part is optional, but I take the filled poblanos and cover them with flour and dip in an egg white mixture with folded in egg yolks before shallow frying them like chiles rellenos.
Parsley – Part of the topping is coarsely cut or hand ripped flat-leaf parsley. Do not use cilantro here as it changes the taste profile.
Pomegranate – The other topping is pomegranate seeds (arils) and you can remove these from a whole pomegranate or just buy the arils.
🍲 Traditional Ingredients
While the above list is what I use in this recipe, the original recipe utilizes fresh, specific ingredients that were harvested in the Puebla area.
The traditional apple is the manzanas panochera, which is a slightly tart and firm apple that holds shape well when cooked and is native to central Mexico. The peach used is another local variety called durazno criollo that has a firm texture and slightly tart flavor. For the pears, the local variety is called pera lechera (milk pear) and other names. These pears are a bit small and quite firm, so they hold up well to being cooked.
For the nogada (walnut sauce), freshly harvested nuez de Castilla are the traditional choice. Fresh walnuts could be cracked open, and the skin usually peels off easily. Since fresh and raw walnuts like these can be difficult to source, the most common option is using shelled, packaged English walnuts. To make them less perishable for shipping and storing, these nuts are force dried, which makes removing the skin more difficult and usually requires soaking to make things easier.
Finally, one of the original ingredients was candied biznaga, or acitrón. Biznagas are round or barrel-shaped cacti that grow in Mexico but take decades to grow to maturity. Once harvested for their pulp, it was boiled and candied into a treat known as acitrón. Unfortunately, because of how long these cacti take to grow to maturity, this ingredient is now illegal to sell, and the cactus is a protected species. Some alternatives are candied jicama and papaya, which can be difficult to find as well, so most modern recipes use dried/candied pineapple or apricot.
🔪 How to Make Chiles en Nogada
This recipe has a lot of ingredients and a lot of separate cooking steps, but once you get moving, everything comes together quickly. The single most tedious part of this recipe is removing the skin from the walnuts. If time is an issue or you don’t have help, I recommend dealing with the walnuts and making the filling a day ahead. Using pre-skinned walnuts can shave hours off the workload, making the recipe easily doable in an afternoon.
The Walnuts
If using packaged walnut halves, you’ll want to start here to soak them and remove the skin so that the sauce won’t taste bitter. Pour a heaping cup of walnuts into a medium bowl and pour 2 cups of hot water over them. I typically use a glass measuring cup filled with water and microwave it on high for 2 minutes. Allow the nuts to soak for at least 1-2 hours and up to overnight.
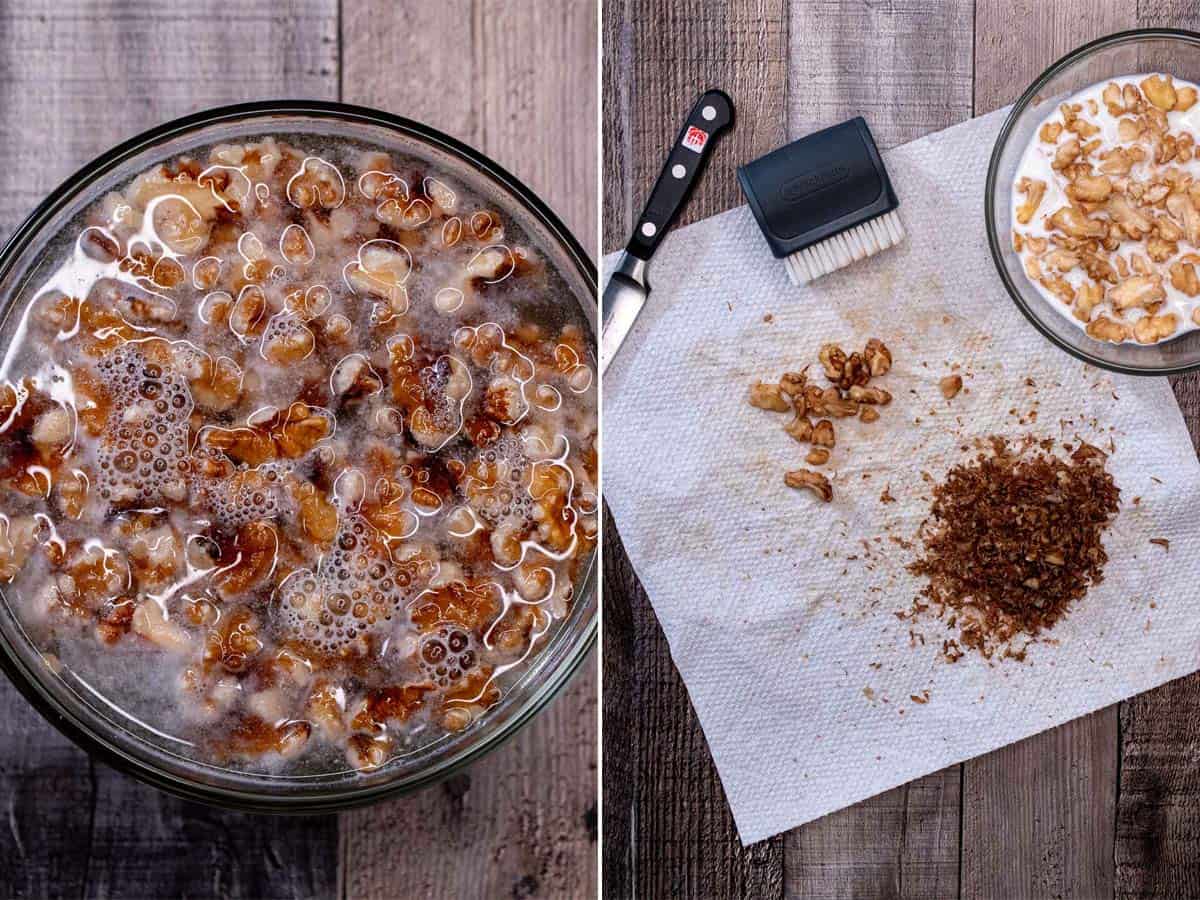
Once softened, drain the walnuts and place them on some paper towels or a clean kitchen towel. You can scrape the skin off with a paring knife or your own nails. Another good method I found is using the stiff bristles of a vegetable cleaning brush.
In another medium bowl, pour in the milk. As you skin the walnuts, toss them into the bowl of milk to soak and stay soft while also adding a nutty flavor to the milk.
If using pre-skinned walnuts, just place them into the bowl of milk while you make the filling.
The Picadillo Filling
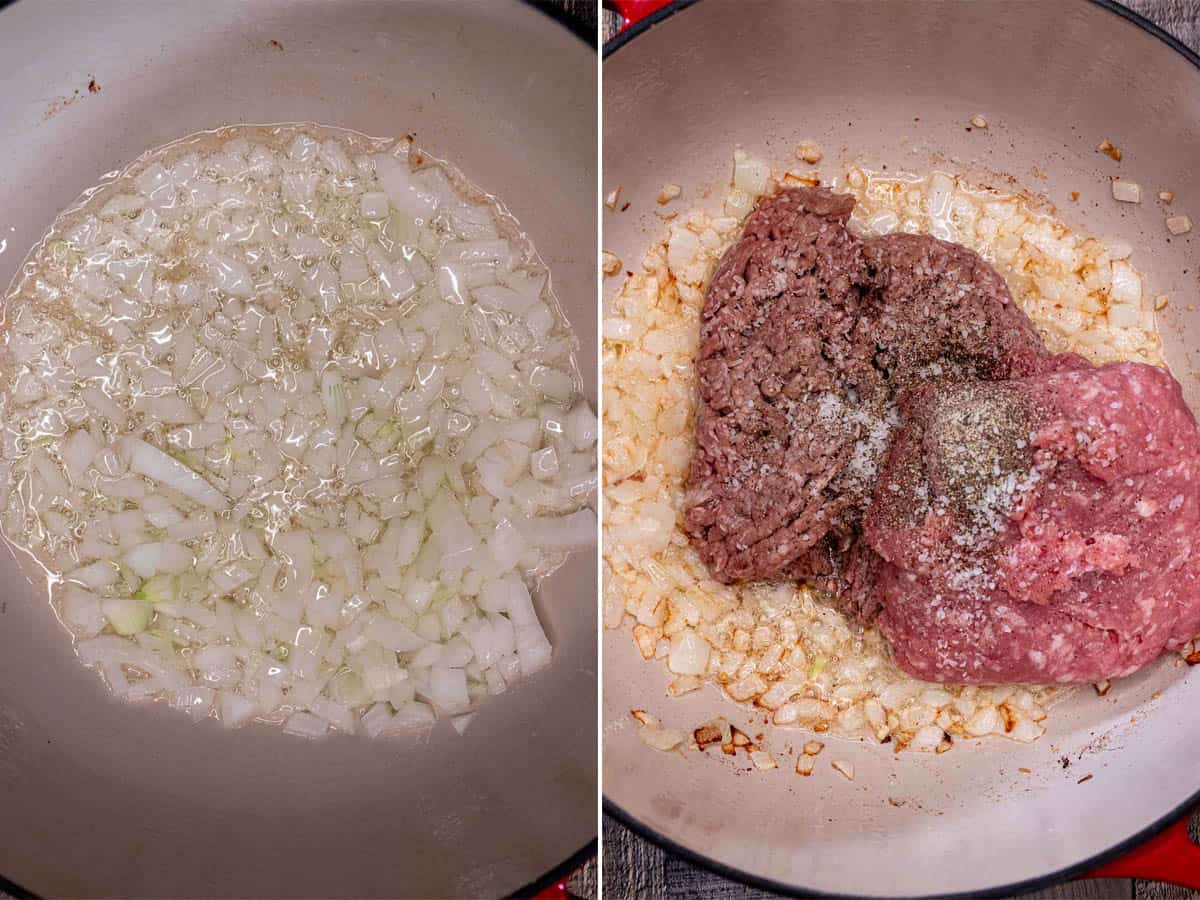
Like the walnuts, this can be prepared a day ahead of time if needed. In a large pan or Dutch-oven, heat some oil over medium to medium-high heat. Place diced white onion in the pan and sauté for 5-6 minutes. It should start turning translucent but without browning. Add minced garlic and cook until fragrant, about a minute longer.
Now add in the ground beef, ground pork, salt, and pepper. Continue cooking while breaking up the meat until there’s very little pink left, about 8-10 minutes.
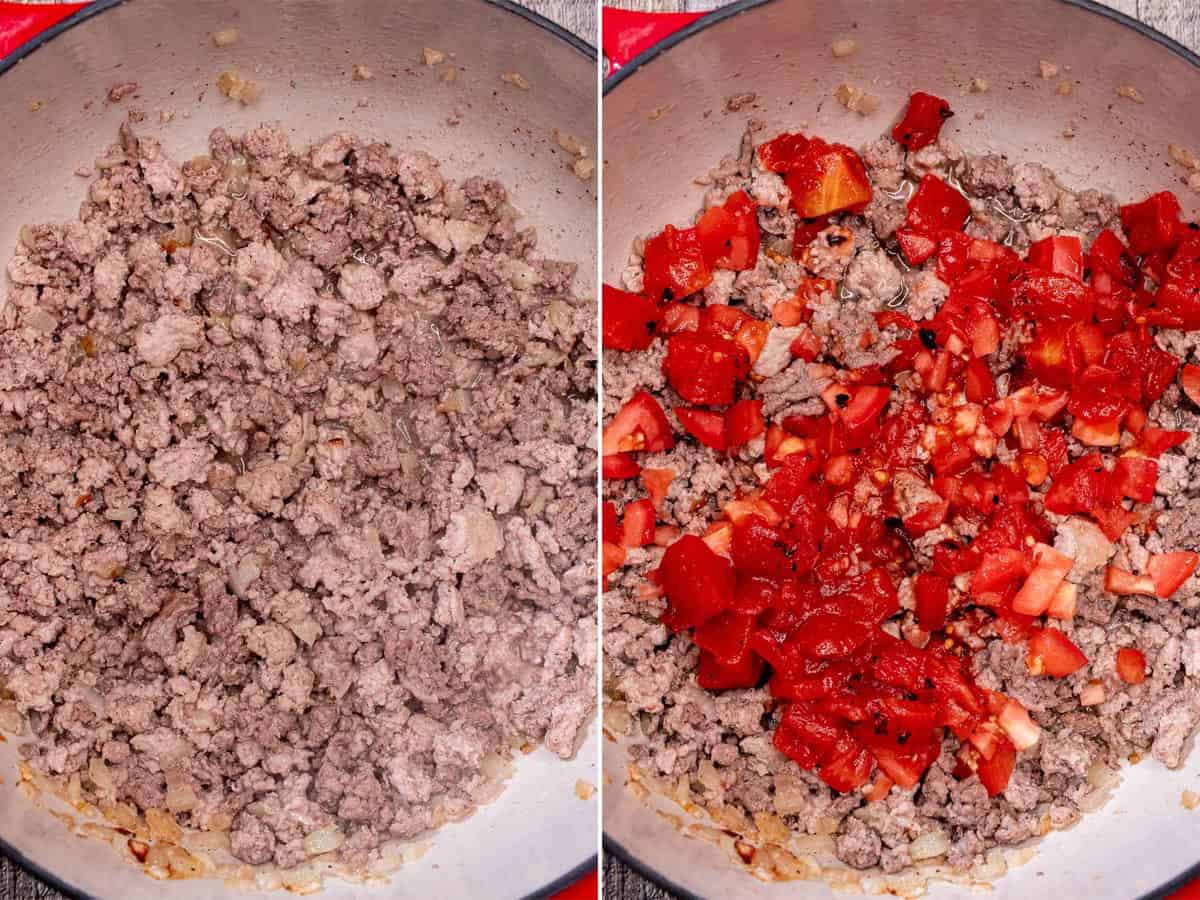
Add the tomatoes and stir to combine. Continue cooking another 3-4 minutes.
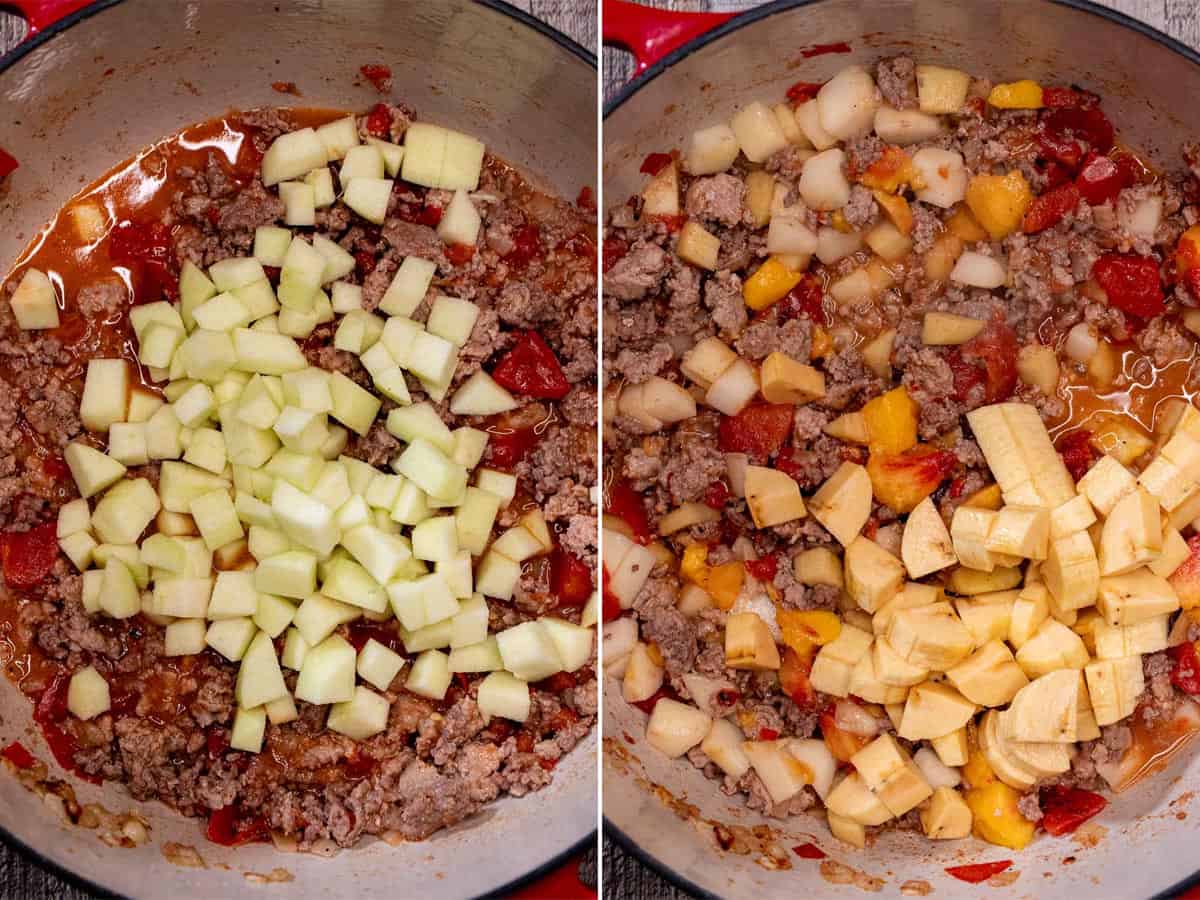
While the tomatoes are cooking and breaking down, peel and dice the apple. I find the apples usually take the longest to cook and soften, so I add these first. Toss the diced apples into the pan and mix to combine.
Quickly peel and dice the pear, peach, and plantain, adding them to the mixture as you go, in that order.
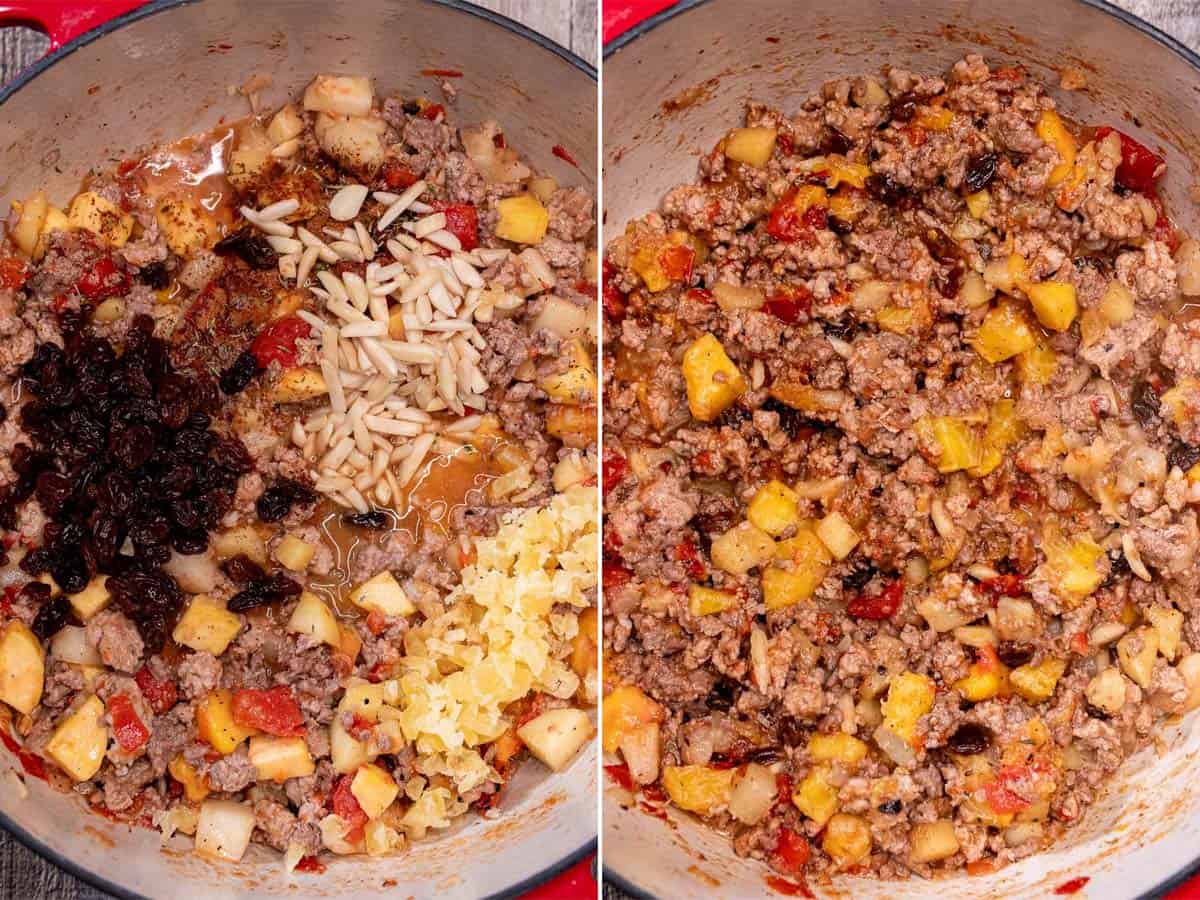
Finally, add the raisins, slivered almonds, candied pineapple, sherry, and the rest of the seasonings to the pan. Stir to combine thoroughly and cover the pan. Allow the mixture to continue cooking, covered, for about 15 minutes, stirring occasionally. Remove from the heat and let cool before using.
The Nogada
While this could also be made ahead of time, I recommend making it shortly before serving instead. Once the walnuts have been dealt with, this literally comes together in less than 5 minutes.
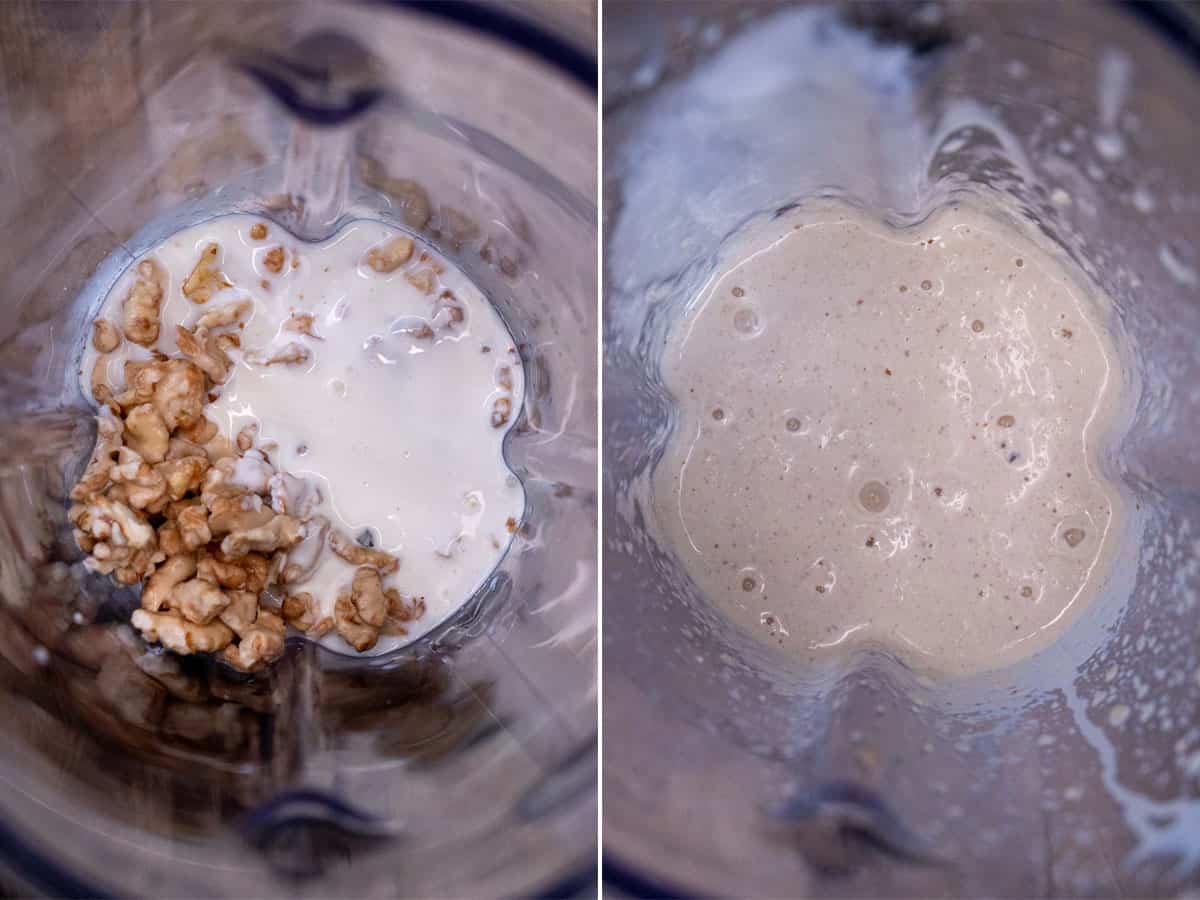
In a blender, add the walnuts and milk they’ve been soaking in, as well as the cream you’re using. Blend on a chopping setting or medium speed to break things up, then increase speed until a smooth sauce forms.
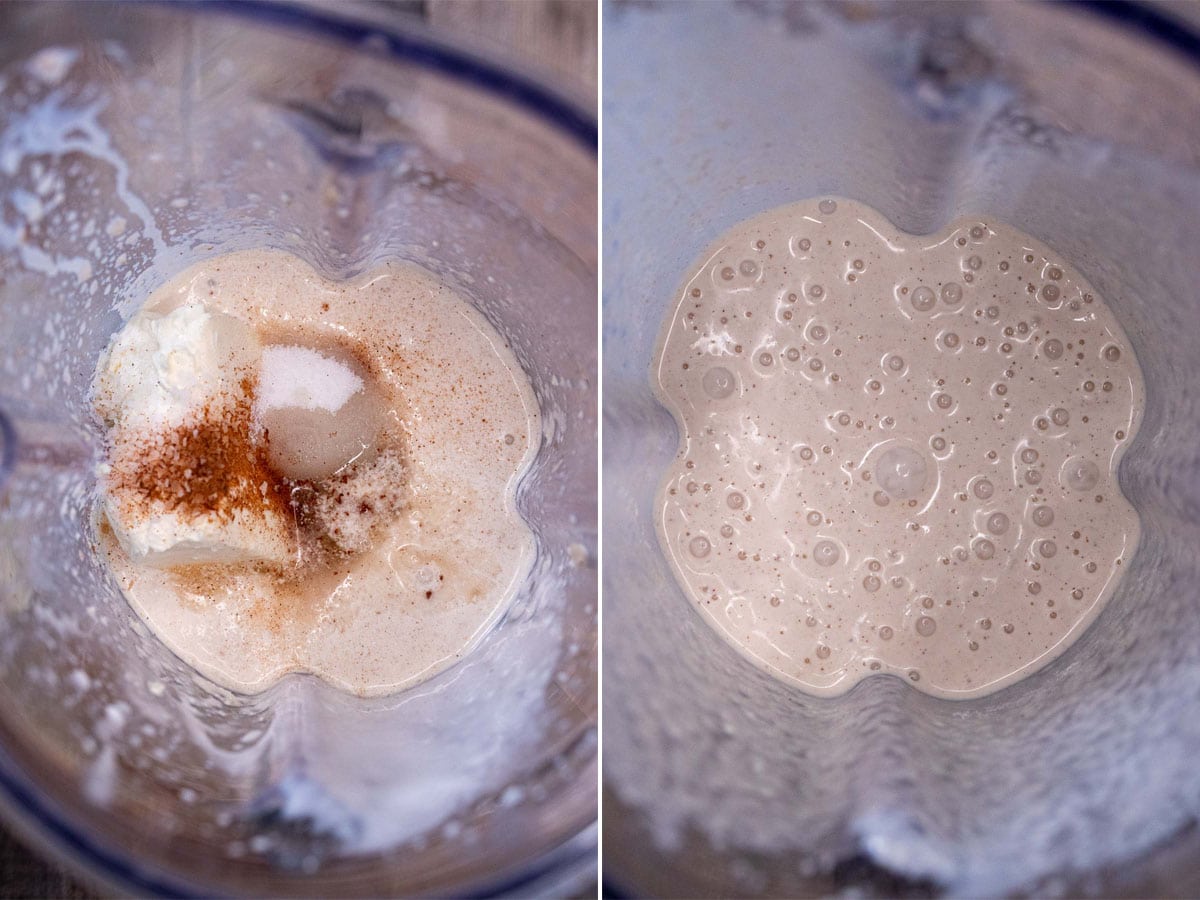
Now add the cheese you’re using, a bit of salt, a pinch of ground cinnamon, and optionally a bit of sugar and sherry. Blend at a medium speed until well combined and smooth. Taste and adjust if you think it needs more salt or sugar. The walnut sauce should be pourable but slightly thick, able to coat the back of a spoon. Wipe a finger across the spoon and if it leaves a clean streak that doesn’t fill back in, you’re good to go.
If the sauce seems a bit thin, add a bit more cheese or crema/heavy cream. Alternatively, if the sauce feels too thick, blend in a bit more milk. Set the sauce aside at room temperature until ready to serve.
Preparing the Poblanos
I recommend doing the poblanos just before serving so that they’re nice and fresh. If you’re trying to be efficient with your time, I’d suggest making the walnut sauce while the peppers are steaming and cooling after roasting.
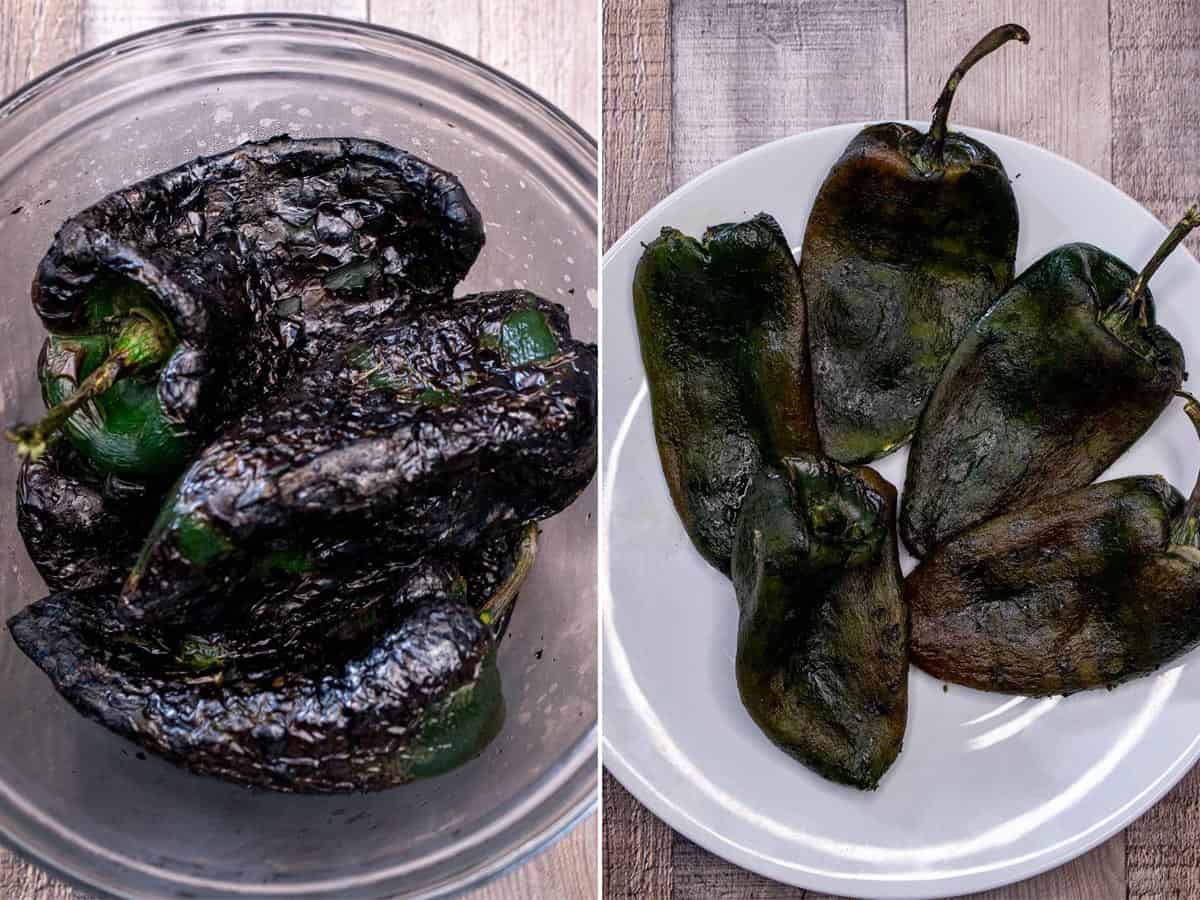
If you have a gas stove, you can roast the poblanos directly on the stove grates. Turn the front burners on high and roast the peppers, turning until blackened on every side, about 3-4 minutes each side. If that’s not an option, heat your oven broiler to high and place the poblanos on a baking sheet. Set the oven rack to the second highest position and broil the peppers, turning occasionally until blackened.
Once roasted, you can place the peppers into a zipper locked gallon bag or in a large bowl covered tightly with plastic wrap. Allow them to steam and cool for 10-15 minutes. Once cool enough to handle, remove the blackened outer skin but leave the stems intact.
Gently cut a slit down one side of the pepper starting close to the top. Slice down a few inches, but don’t cut all the way to the bottom. Carefully cut or pull away the seeds and pith inside the poblano. A quick rinse inside the pepper can help wash out any seeds you couldn’t reach. Set the peppers aside as you work on them.
Stuff each poblano gently with the filling, being careful not to overstuff. You should be able to get a few tablespoons of filling into each one.
Frying the Stuffed Poblanos (Optional)
This step is optional since it adds even more steps to an already complex recipe. While traditional in Puebla, many regions and modern recipes skip this step. The fried, eggy batter holds onto the sauce well, and adds a nice flavor, but also makes an already rich, creamy dish even heavier.
Start by heating some neutral oil in a large pan over medium heat. You’ll be shallow frying the peppers, so you just need enough oil to come roughly halfway up their side. Dip the handle of a wooden spoon into the oil, if you see small bubbles forming around it, the oil is good to go.
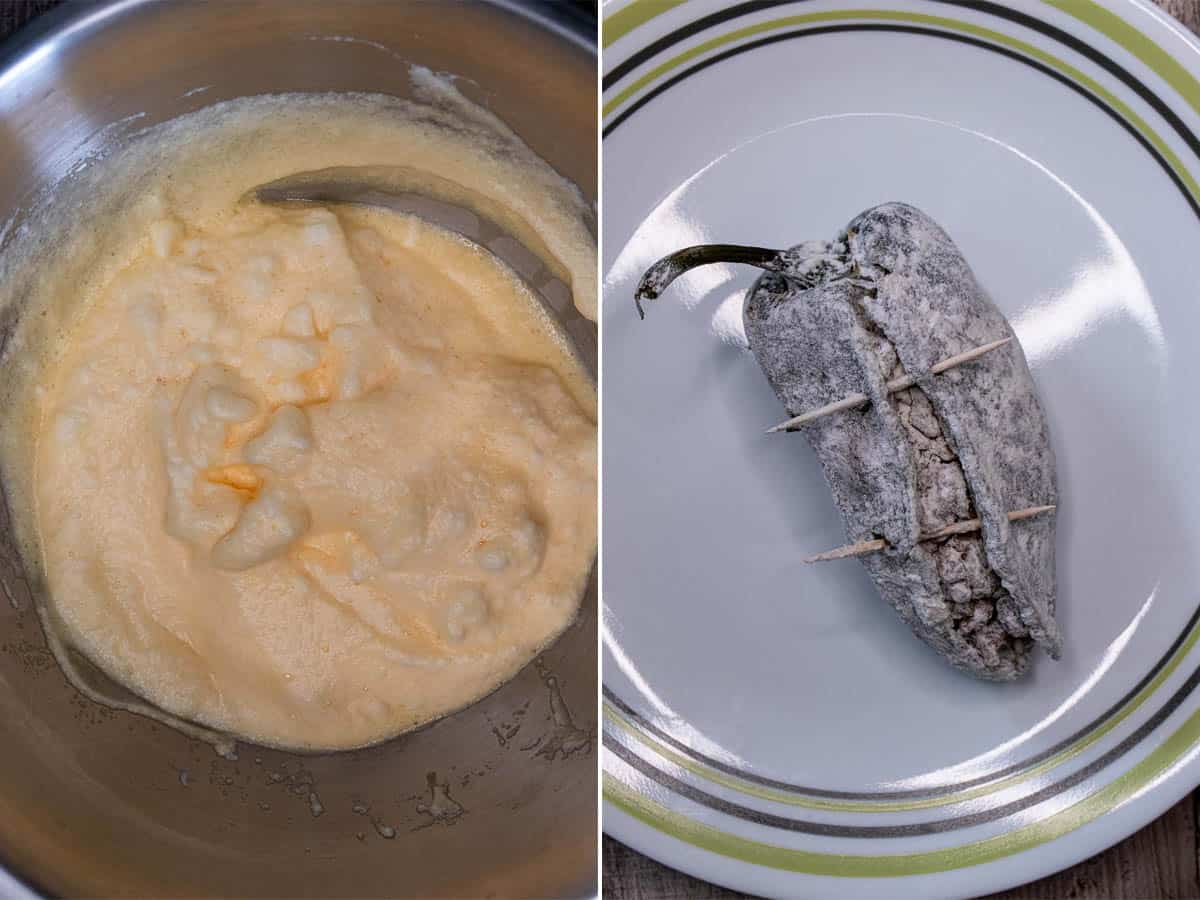
While the oil heats up, separate the eggs. In a large mixing bowl, add the egg whites and beat them at high speed until stiff peaks form. Now gently fold in the egg yolks, one at a time, until you have a fluffy batter.
Take the filled poblanos and try to seal the opening with two toothpicks. In a large bowl, add flour. Dip the peppers into the flour and cover it on all sides. Shake off any excess flour and dip the peppers into the egg batter.
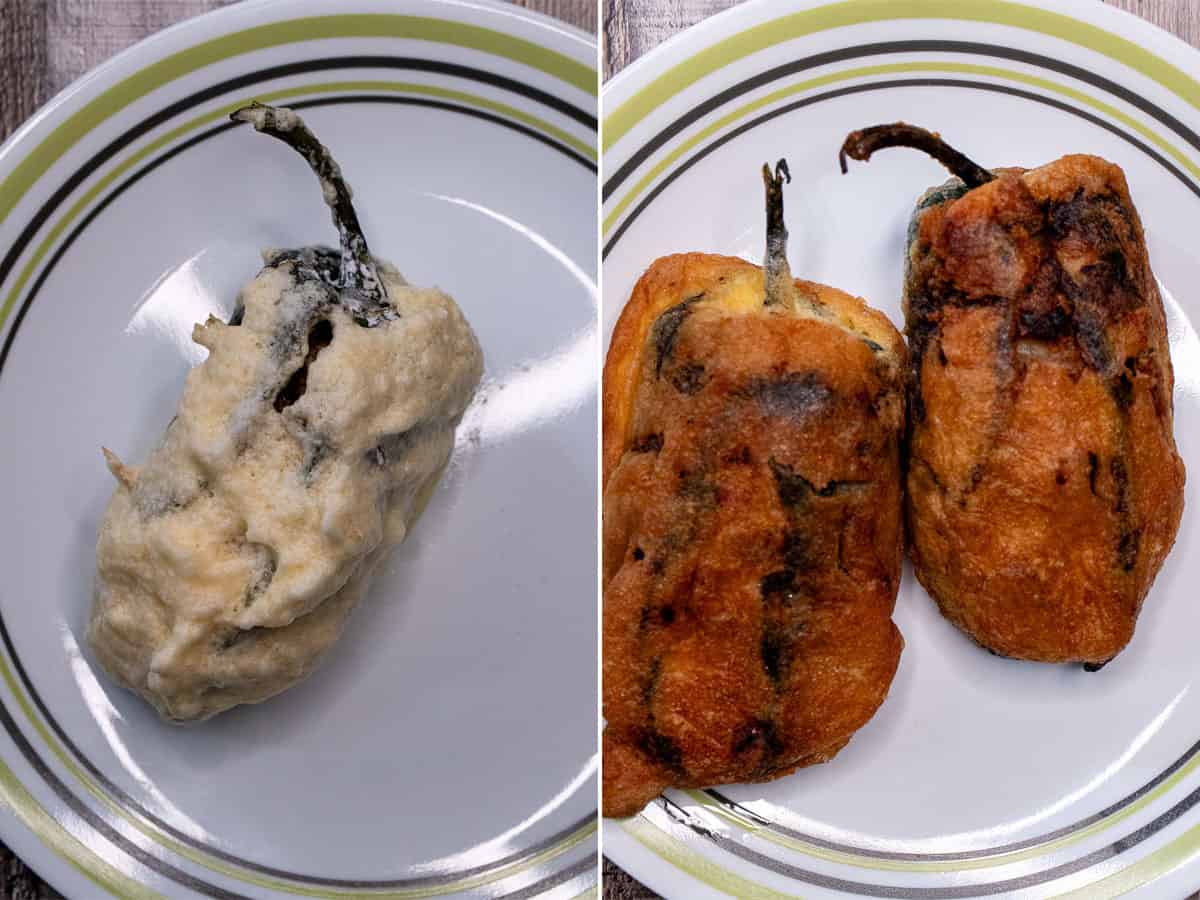
Quickly transfer the battered poblanos into the oil (depending on pan size, you can probably cook two at once). While the bottom is frying, carefully spoon oil over the top of the pepper so the batter sets. Fry for about 3-4 minutes until golden brown, carefully flip the pepper over and continue frying for another 2-3 minutes. After flipping, spoon a little oil over the top and around the sides.
Once golden brown on all sides, transfer the cooked peppers to a paper towel-lined baking sheet to cool. Continue battering and frying until all the peppers are done and have a chance to cool a bit.
Plating Chiles en Nogada
Once all the poblanos have been stuffed and optionally fried, you can plate and top them. You can plate them in a large baking dish or serving dish to serve community style, or plate them individually for each person.
In the middle of a plate (or serving dish) pour a small splash of the walnut sauce and place the stuffed poblano on top. Pour enough sauce over the top of the pepper to cover the top and pool down the sides and onto the plate.
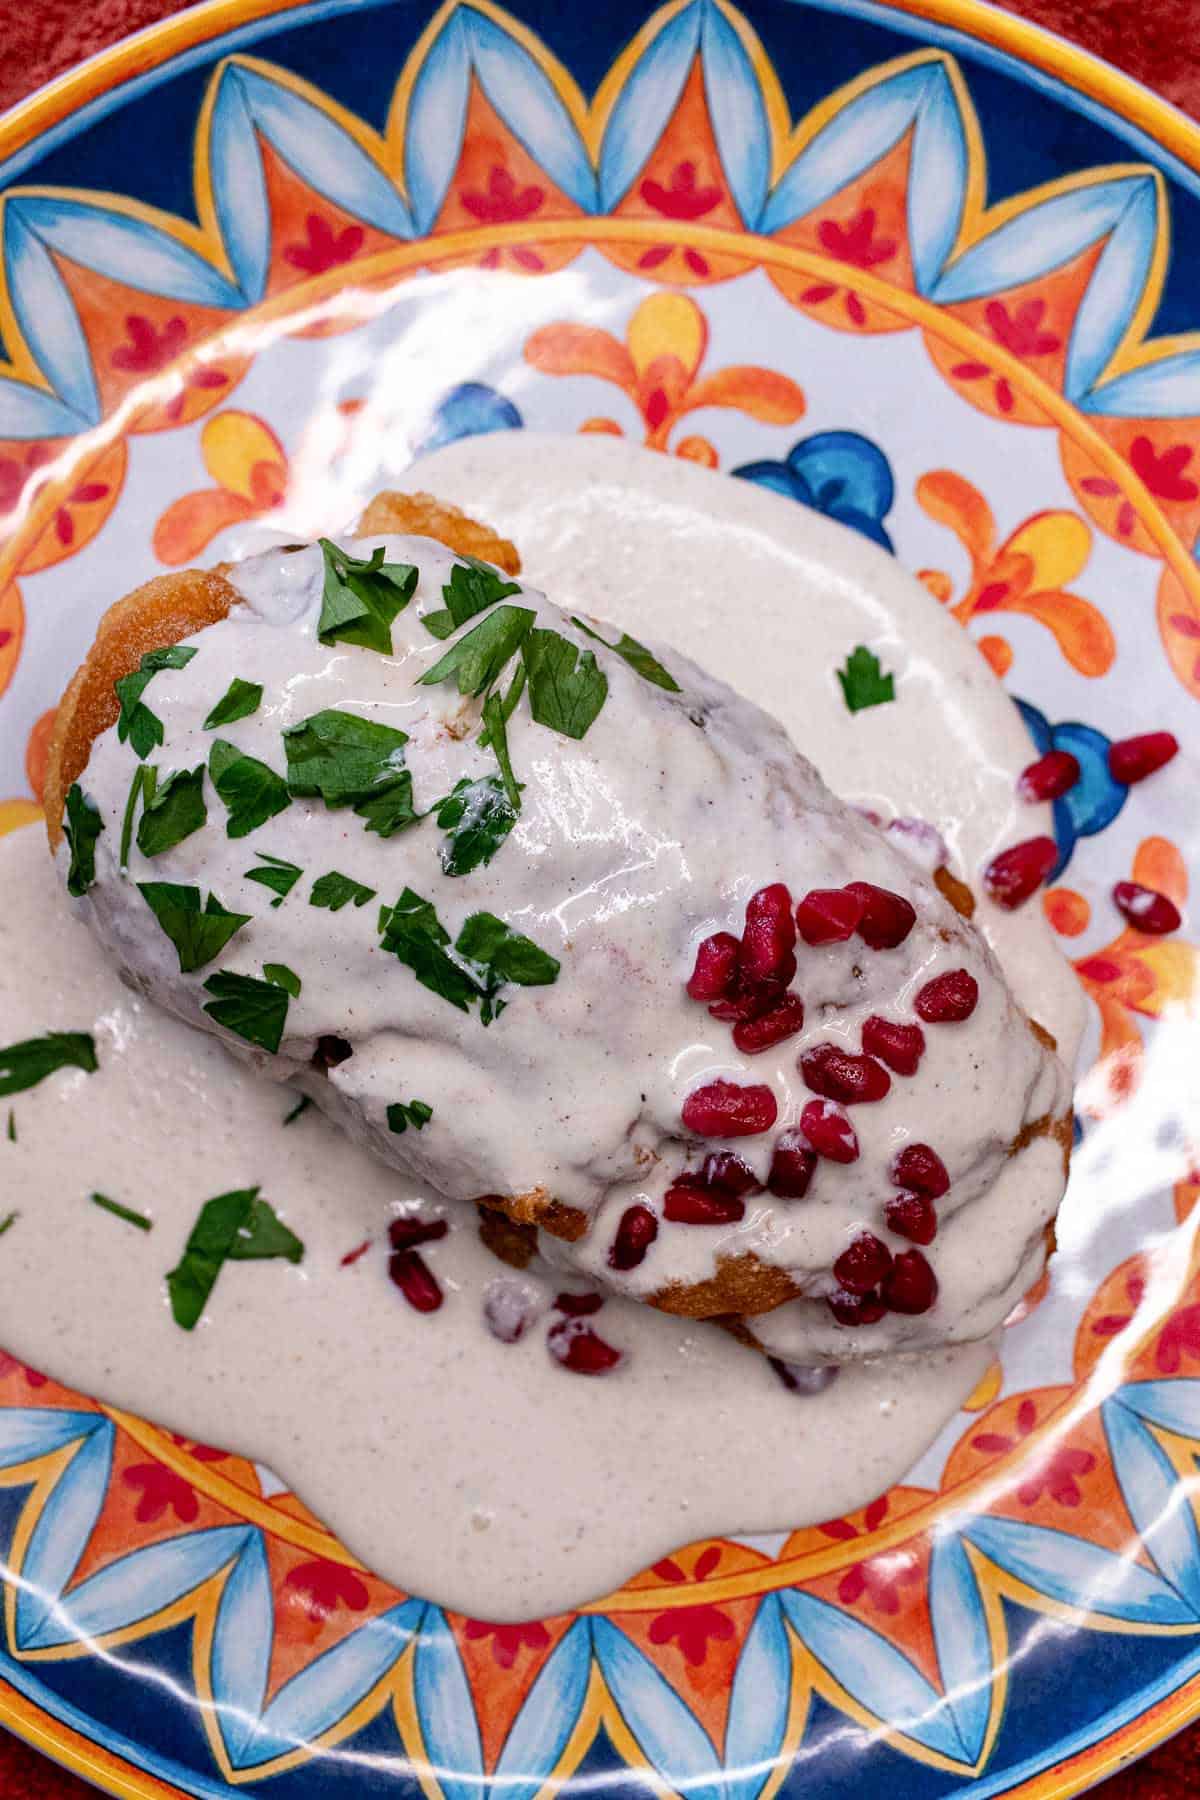
To top them, roughly chop or hand rip some flat-leaf parsley and sprinkle over ⅓ of the pepper. On the other side, sprinkle some pomegranate seeds (arils) over the other ⅓ of the pepper. This symbolizes the colors of the Mexican flag of red, white, and green. Alternatively, you can just sprinkle the parsley and pomegranate arils over the whole pepper.
Traditionally this dish is served at room temperature or still slightly warm. It is a rich and filling dish normally served on its own. If you want something to go with it, however, it can also be served with side of black beans, refried beans, or some Mexican rice.
📖 Tips, Shortcuts, & Variations
With an ingredient heavy recipe with multiple steps going on, sometimes a few modern shortcuts can streamline the process. If you’re making this dish with family, the entire process can be a fun bonding experience. When making it alone or with one other person, these shortcuts can greatly reduce the time it takes to make the dish.
Tips & Shortcuts
Uniform Sizes – When dicing the fruit, try to keep everything cut to similar sizes. This helps things cook more evenly and allows each fork full of food to have a bit of everything in each bite. Uniform sizes include raisins, nuts, and candied fruit. The fresh fruit can be slightly bigger since they will reduce a bit as they cook down.
What to Make Ahead of Time – If time is a factor for you, especially if cooking this solo, some stuff can be done ahead of time. As mentioned in the directions, soaking and skinning the walnuts and making the filling can be done the day before making the dish. If needed, you can also make the walnut sauce beforehand also, though I recommend doing that shortly before serving. Roasting and stuffing the poblanos I recommend doing the day you’re serving to preserve freshness.
Ground Pork – Older recipes would use cuts like pork shoulder that are hand cut into small pieces. This adds extra work, and you won’t typically find 1-2-pound cuts of shoulder for sale. Using ground pork is a great modern shortcut.
Ground Spices – Using whole spices can be great, but grinding cinnamon, cloves, and thyme in a molcajete can be time consuming. Skip the extra step and use ground versions.
Pomegranate Arils – Feel free to buy a whole pomegranate and remove the seeds yourself. However, if you can buy the seeds (arils) on their own, this is another great time saver, and the price difference isn’t typically that big.
Pre-Skinned Walnuts – You can sometimes find these in stores but more likely online. While the price is at least double, the time saved is so much that it can be worth it unless you have multiple people helping make this dish.
Skip the Fry – Frying in the eggy batter adds a lot of richness to this dish, but most modern recipes will skip this step. Considering how many steps go into making chiles en nogada, a lot of people will skip this part, and the recipe is still delicious.
Variations
Bread Thickener – For the walnut sauce, some people will use a slice or two of white bread as a thickener. Soak the bread in some milk or sherry and blend with the rest of the sauce ingredients. This helps thicken the sauce without relying on extra fatty dairy and gives it a smooth texture.
Cheese Options – Purists will say goat cheese is the only proper cheese for chiles en nogada. The specific goat cheese used, however, can be difficult to source. One of the few actual goat cheeses with wider availability is typically the French goat cheese chèvre, even better if it is a slightly aged version.
Not everyone is a big fan of goat cheese though, and a lot of modern recipes will use goat cheese, queso fresco, or cream cheese either solo or in combinations. When used in combinations of two, the total amount is usually between 6-8-ounces.
Mixed Nuts – In the filling I use just slivered almonds here, but many recipes will use a combination. Feel free to experiment with what you prefer. The most common nuts used include almonds, walnuts, pecans, and pine nuts. Also, while nogada literally means walnut sauce, sometimes pecans are used instead. The taste is still delicious.
Sweeter Filling – Many recipes add sugar into the picadillo filling. Personally, I find all the added fruits sweeten the dish plenty. If you would like to add more sweetness though, feel free to add up to a ¼ cup of piloncillo or brown sugar when cooking the filling.
📜 Origin of Chiles en Nogada
Chiles en nogada are closely tied to Mexican Independence Day and are often eaten during the months of August and September since the fruits like manzanas panochera (apple), durazno criollo (peach), pera lechera (pear), and pomegranates, as well as the nuez de Castilla (walnuts) are in season.
While Mexican Independence Day was declared on September 16th, 1810, in what is called the “Cry of Dolores”, it took 11 more years to gain it on September 28th, 1821. After signing the Treaty of Córdoba (establishing Mexican independence from Spain), the leader of the Army of the Three Guarantees, Agustín de Iturbide (future first emperor of Mexico) visited the town of Puebla during the religious festivities for Saint Augustine.
For the feast, the Augustinian nuns from the Santa Monica Convent were tasked with creating a unique dessert to present to Iturbide. They came up with a poblano stuffed with in-season fruits, covered in a walnut sauce, and decorated with pomegranate seeds. These colors matched the flag of the Army of the Three Guarantees: white from the sauce (religion), green from the poblano (land), and red from the pomegranate (blood of the heroes). This flag was considered the first official national flag of Mexico.
Shortly later, the beloved dish from Puebla was modified by adding meat to the filling and became a main dish.
🍽 Recommended Equipment
No specialized equipment is needed here, but here’s just a few items I recommend having or considering before you make this Mexican dish.
Skinned Walnuts – Not equipment, but if you’re making this on your own or need to save time, I highly recommend buying skinned walnuts. Removing the skin isn’t difficult after soaking them, but it is incredibly tedious and time consuming. One heaping cup took me over 2 hours to finish, so the decision of price vs time is up to you.
Vegetable Brush – If you decide to skin the walnuts yourself, I find a vegetable brush to be useful. Use the stiffer side instead of the softer bristles. You’ll still need to get in with your nails or a knife, but the brush does a good job of scraping a lot off or at least loosening the skin. The bristles also make it easier to get into all the random grooves of a walnut.
Blender – As usual, I never recommend or push home cooks towards expensive blenders like a $500 Vitamix unless you do some serious blending on an almost daily basis. However, I do recommend a decent mid-tier blender because they do a much job at things like soups, sauces, and in this case, smoothly pureeing the walnuts.
❄️ How to Store Chiles en Nogada
If you’re planning on having leftovers, I recommend not fully making them or at least not saucing them. The components should all be stored separately if possible. The walnut sauce and the stuffed or unstaffed peppers can be stored in airtight containers in the refrigerator for up to 3 days. The picadillo stuffing by itself can be stored for 3-5 days and refrigerated as well.
If you fry the poblanos, I recommend storing them in a container with a paper towel to soak up moisture and keep the fried batter as dry as possible. Storing finished chiles that are covered in walnut sauce isn’t impossible though, they just won’t reheat as well because the sauce will likely split.
I do NOT recommend freezing this dish. Thawing and reheating from frozen will result in watery results with horrible texture. However, you could technically freeze the filling for up to 2 months if you have extra and wish to make more peppers later.
For reheating, if you stored the poblanos and sauce separately as mentioned, you have a few options here. For the walnut sauce, I recommend setting it out on the counter for at least 30-40 minutes before serving to come close to room temperature. Optionally, you can heat the sauce in the microwave in short bursts until it is just warmed, stirring each time. This will more likely cause the sauce to split but keep stirring and it should be ok.
For the peppers, you can microwave until warm, but I recommend heating in the oven at 325-350°F until just warmed through. Top with the room temperature sauce and decorate again with parsley and pomegranate.
📋 Recipe
Chiles en Nogada
Ingredients
Walnuts:
- 1 cup walnut halves, heaping, see note
- 2 cups water, hot
Filling:
- 2 tablespoons oil, or lard
- ½ white onion, diced
- 2 cloves garlic, minced
- 1 pound ground beef
- 1 pound ground pork
- 2 teaspoons kosher salt
- 1 teaspoon ground black pepper
- 2 Roma tomatoes, diced, see note
- 1 medium apple, peeled and diced, see note on fruit
- 1 medium pear, peeled and diced
- 1 medium peach, peeled and diced
- 1 medium plantain, peeled and diced
- ½ teaspoon ground cinnamon
- ½ teaspoon dried thyme
- ⅛ teaspoon ground cloves
- ¼ cup raisins, regular or golden
- ¼ cup slivered almonds
- 3 tablespoons candied pineapple, chopped small
- 2 tablespoons sherry, optional
Walnut Sauce:
- 1 cup skinned walnuts, heaping, see note
- ½ cup whole milk
- 4 ounces goat cheese, see note
- 4 ounces queso fresco or cream cheese, see note
- ½ cup Mexican crema, or heavy cream
- ½ teaspoon kosher salt, more to taste
- ½ teaspoon ground cinnamon
- 1 tablespoon white sugar, optional, more to taste
- 2 teaspoons sherry, optional
Poblanos & Toppings:
- 6-8 large poblanos
- Flat-leaf parsley, for garnish
- Pomegranate arils, for garnish
For Frying (Optional):
- 1 cup all-purpose flour
- 5 large eggs, separated
- Neutral oil, enough for shallow frying
Directions
The Walnuts:
- If using packaged walnut halves, you’ll want to start here to soak them and remove the skin so that the sauce won’t taste bitter. Pour a heaping cup of walnuts into a medium bowl and pour 2 cups of hot water over them. I typically use a glass measuring cup filled with water and microwave it on high for 2 minutes. Allow the nuts to soak for at least 1-2 hours and up to overnight.
- Once softened, drain the walnuts and place them on some paper towels or a clean kitchen towel. You can scrape the skin off with a paring knife or your own nails. Another good method I found is using the stiff bristles of a vegetable cleaning brush.
- In another medium bowl, pour in ½ cup whole milk. As you skin the walnuts, toss them into the bowl of milk to soak and stay soft while also adding a nutty flavor to the milk.
- If using pre-skinned walnuts, just place them into the bowl of milk while you make the filling.
The Picadillo Filling:
- Like the walnuts, this can be prepared a day ahead of time if needed. In a large pan or Dutch-oven, heat 2 tablespoons oil or lard over medium to medium-high heat. Place ½ a diced white onion in the pan and sauté for 5-6 minutes. It should start turning translucent but without browning. Add 2 minced garlic cloves and cook until fragrant, about a minute longer.
- Now add 1-pound ground beef, 1-pound ground pork, 2 teaspoon kosher salt, and 1 teaspoon ground black pepper. Continue cooking while breaking up the meat until there’s very little pink left, about 8-10 minutes. Add 2 diced Roma tomatoes and stir to combine. Continue cooking another 3-4 minutes.
- While the tomatoes are cooking and breaking down, peel and dice the apple. I find the apples usually take the longest to cook and soften, so I add these first. Toss the diced apple into the pan and mix to combine. Quickly peel and dice the pear, peach, and plantain, adding them to the mixture as you go, in that order.
- Finally, add ½ teaspoon ground cinnamon, ½ teaspoon dried thyme, ⅛ teaspoon ground cloves, ¼ cup raisins, ¼ cup slivered almonds, 3 tablespoons candied pineapple, 2 tablespoons sherry (optional) to the pan. Stir to combine thoroughly and cover the pan. Allow the mixture to continue cooking, covered, for about 15 minutes, stirring occasionally. Remove from the heat and let cool before using.
The Nogada:
- While this could also be made ahead of time, I recommend making it shortly before serving instead. Once the walnuts have been dealt with, this literally comes together in less than 5 minutes.
- In a blender, add the walnuts and whole milk they’ve been soaking in, as well as ½ cup of the cream you’re using. Blend on a chopping setting or medium speed to break things up, then increase speed until a smooth sauce forms.
- Now add the 6-8-ounces of cheese you’re using, ½ teaspoon kosher salt, ½ teaspoon ground cinnamon, and optionally 1 tablespoon white sugar and 2 teaspoons sherry. Blend at a medium speed until well combined and smooth. Taste and adjust if you think it needs more salt or sugar. The walnut sauce should be pourable but slightly thick, able to coat the back of a spoon. Wipe a finger across the spoon and if it leaves a clean streak that doesn’t fill back in, you’re good to go.
- If the sauce seems a bit thin, add a bit more cheese or crema/heavy cream. Alternatively, if the sauce feels too thick, blend in a bit more milk. Set the sauce aside at room temperature until ready to serve.
Preparing the Poblanos:
- I recommend doing the poblanos just before serving so that they’re nice and fresh. If you’re trying to be efficient with your time, I’d suggest making the walnut sauce while the peppers are steaming and cooling after roasting.
- If you have a gas stove, you can roast the 6-8 poblanos directly on the stove grates. Turn the front burners on high and roast the peppers, turning until blackened on every side, about 3-4 minutes each side. If that’s not an option, heat your oven broiler to high and place the poblanos on a baking sheet. Set the oven rack to the second highest position and broil the peppers, turning occasionally until blackened.
- Once roasted, you can place the peppers into a zipper locked gallon bag or in a large bowl covered tightly with plastic wrap. Allow them to steam and cool for 10-15 minutes. Once cool enough to handle, remove the blackened outer skin but leave the stems intact.
- Gently cut a slit down one side of the pepper starting close to the top. Slice down a few inches, but don’t cut all the way to the bottom. Carefully cut or pull away the seeds and pith inside the poblano. A quick rinse inside the pepper can help wash out any seeds you couldn’t reach. Set the peppers aside as you work on them.
- Stuff each poblano gently with the filling, being careful not to overstuff. You should be able to get a few tablespoons of filling into each one.
Frying the Stuffed Poblanos (Optional):
- This step is optional since it adds even more steps to an already complex recipe. While traditional in Puebla, many regions and modern recipes skip this step. The fried, eggy batter holds onto the sauce well, and adds a nice flavor, but also makes an already rich, creamy dish even heavier.
- Start by heating 2-4 cups of neutral oil in a large pan over medium heat. You’ll be shallow frying the peppers, so you just need enough oil to come roughly halfway up their side. Dip the handle of a wooden spoon into the oil, if you see small bubbles forming around it, the oil is good to go.
- While the oil heats up, separate the 5 large eggs. In a large mixing bowl, add the egg whites and beat them at high speed until stiff peaks form. Now gently fold in the egg yolks, one at a time, until you have a fluffy batter.
- Take the filled poblanos and try to seal the opening with two toothpicks. In a large bowl, add 1 cup all-purpose flour. Dip the peppers into the flour and cover it on all sides. Shake off any excess flour and dip the peppers into the egg batter.
- Quickly transfer the battered poblanos into the oil (depending on pan size, you can probably cook two at once). While the bottom is frying, carefully spoon oil over the top of the pepper so the batter sets. Fry for about 3-4 minutes until golden brown, carefully flip the pepper over and continue frying for another 2-3 minutes. After flipping, spoon a little oil over the top and around the sides.
- Once golden brown on all sides, transfer the cooked peppers to a paper towel-lined baking sheet to cool. Continue battering and frying until all the peppers are done and have a chance to cool a bit.
Plating Chiles en Nogada:
- Once all the poblanos have been stuffed and optionally fried, you can plate and top them. You can plate them in a large baking dish or serving dish to serve community style, or plate them individually for each person.
- In the middle of a plate (or serving dish) pour a small splash of the walnut sauce and place the stuffed poblano on top. Pour enough sauce over the top of the pepper to cover the top and pool down the sides and onto the plate.
- To top them, roughly chop or hand rip some flat-leaf parsley and sprinkle over ⅓ of the pepper. On the other side, sprinkle some pomegranate seeds (arils) over the other ⅓ of the pepper. This symbolizes the colors of the Mexican flag of red, white, and green. Alternatively, you can just sprinkle the parsley and pomegranate arils over the whole pepper.
- Traditionally this dish is served at room temperature or still slightly warm. It is a rich and filling dish normally served on its own. If you want something to go with it, however, it can also be served with side of black beans, refried beans, or some Mexican rice.
Amanda says
My mom and I were lucky enough to try this incredible dish prepared by Chef Pezzana, and it was truly an experience. My mom, who is also a chef, immediately recognized the work, patience, and attention to detail that go into making Chiles en Nogada from scratch.
Having spent more than a decade in the restaurant industry and helping run my family’s restaurant, I can say that what impressed me most was how beautifully everything came together. It’s colorful and stunning to look at, but the flavor is what really makes it special—the combination of sweet, savory, creamy, and fresh flavors is unlike anything else.
More than just a beautiful plate, this dish feels like a work of art and a celebration of the history and complexity of Mexican cuisine. Chef Pezzana did an amazing job honoring that while creating something truly memorable. We felt very lucky to experience it!
Chris Pezzana says
High praise from your mom indeed! So glad that you two enjoyed the dish~