An all-butter pie crust creates a tasty and super flaky crust that holds up well to any filling. This recipe helps guide you through the steps involved and helps alleviate the apprehension most people have when trying to make a pie dough from scratch. This recipe makes 2 pie crusts for a double shelled pie or 2 single crust pies.
Pie crusts can be difficult to work with, especially for novice bakers. I spent years dreading making a pie crust from scratch myself. I was always up for trying, but they always seemed to be too dry and just fall apart, or too wet and just came out as a pile of mushy flour that couldn’t be rolled out. Understanding a little of the science behind what makes a pie crust work or not helps though, as does a properly written recipe that explains the steps involved.
Recipes for a good pie crust are one of the staples almost everyone’s grandmother has written on an index card somewhere. One of my own grandmother’s sisters was known for her apple pies and the super flaky crusts she managed to create for them. In reality though, almost all recipes for a pie crust are fairly close to identical, at least with the ingredients, what really makes a difference is in the technique behind them.
What is a Pie Crust?
What most people consider a dough made for pie crust is actually a type of shortcrust pastry. All you need is flour, fat, and water to make it.

As the pastry cooks, it creates a flaky, hardened shell that holds a pie or tart together. What allows the pie crust to work, is also its main enemy: gluten. You need some gluten strands to form to hold the crust together, but too much and you end up with a dense, chewy crust instead of that flaky, crumbly pastry you set out to create.
An all-butter pie crust can be a little more finicky to work with but can also create a super flaky crust with a great flavor. This is because butter is composed of 15-18% water, unlike shortening which is 100% fat. When the pie goes into a hot oven, that water turns to steam and creates the flaky layers.
Ingredients for an All-Butter Pie Crust
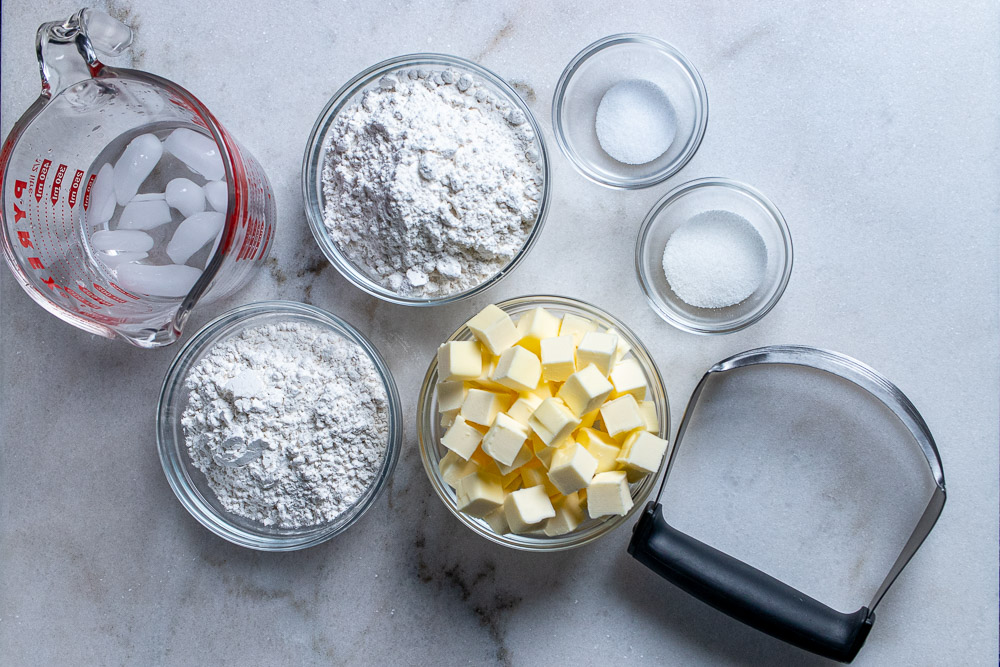
Flour – The structure for your pie crust
Salt – Just a little bit to bring out flavor
Sugar – Optional. The pastry for pie crust shouldn’t be sweet, but a little bit helps boost the flavor as well as the browning.
Butter – As the name implies, the fat of choice for this pie crust will be butter alone. Use unsalted, and very cold.
Ice Water – Not just cold water, but ice-cold water. Literally, measure some out and toss some ice cubes in, then measure as you use it.
Steps for Making the Pie Crust
Basically, you just need to mix the dry ingredients together, mix the butter into them, then add enough water until you can push it all together into a ball. What makes the difference here is in how you get to the final step.

Divide the flour into 1.5 cups and 1 cup reserved. Mix the larger amount of flour with the other dry ingredients.
Using a pastry cutter or a food processor, cut the butter into the flour mixture.
Add the rest of the flour and continue cutting the butter into the mixture.
Add the ice water, 2 tablespoons at a time, and mix with a hard spatula or your hands until the dough begins to take shape.
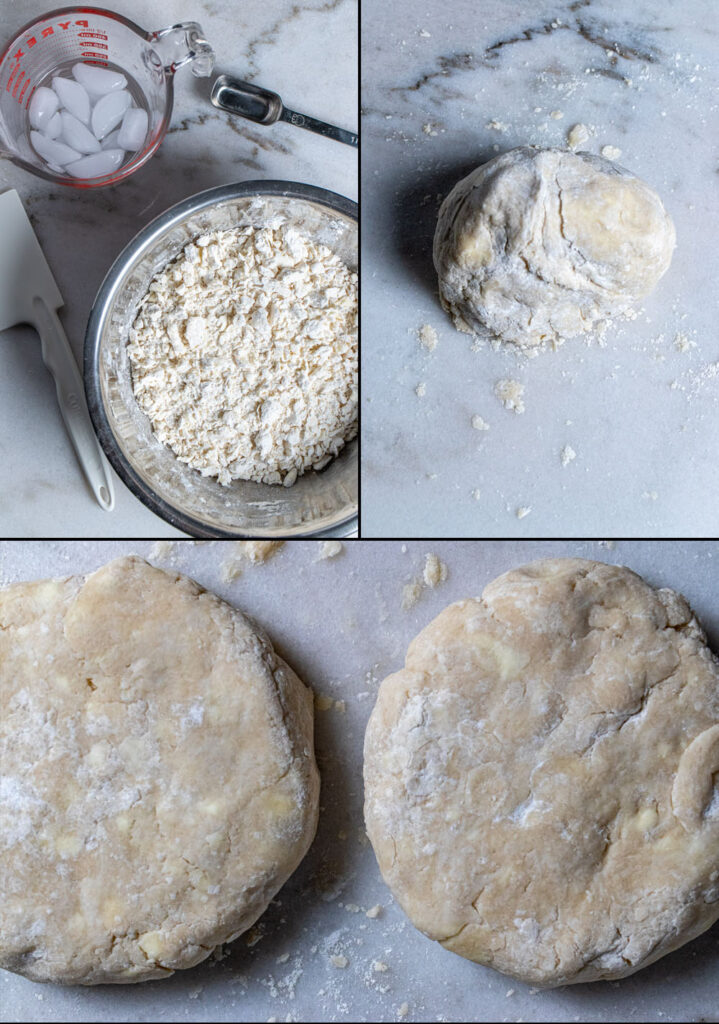
Shape the dough into a ball and then cut it in half.
Press both halves down until you can form a disc roughly 1” tall. Wrap each disc in plastic wrap.
Refrigerate for at least 2 hours, or up to 3-4 days.
Everything Should Be Ice Cold
Earlier I mentioned that gluten formation is the main enemy of pie crusts. The other major enemy for a good pie crust is warmth, especially an all-butter crust.
Butter’s melting temperature is a few degrees below your own body’s natural temperature. Because of this, the more you handle the dough, the quicker the butter will begin to melt. If you tried making a pie crust with all room temperature ingredients, you’d end up with a tough, chewy, greasy pie crust that tasted more like a dense bread crust than a flaky, buttery crust.

So how do you avoid that kind of disaster? Keep everything ice cold throughout the entire process.
Take the butter straight from the refrigerator and cut it into ½” cubes. Then toss the butter and your flour into the freezer for at least 15 minutes before you start making the recipe.
After cutting the butter into the first 1 ½ cups of flour, measure out at least ¾ cup of water and toss in some ice cubes. After cutting the other cup of flour into the mixture, use a tablespoon to add the ice-cold water a little at a time until you can make your dough ball.
When you’re ready to start rolling the dough out, try to work quickly, but if the dough ever feels a little too warm, toss the whole thing into the freezer for a few minutes.
After you fill the pie, you can also put the entire dish into the fridge or freezer for a little bit before going into the oven as well. If you’re using a glass pie dish, however, don’t go straight from the freezer to a hot oven or it could shatter.
How to Roll Out Your All-Butter Pie Crust
After chilling your pie crust discs for at least two hours, remove one of them and let it stand at room temperature for 5-10 minutes if it feels solid. Only work on one disc at a time while the other stays chilled.

Lightly flour your work surface, as well as your hands and your rolling pin. It’s a good idea to keep a small bowl of flour and a small bowl of ice water handy while you work on rolling out the dough.
Remove the disc from the plastic wrap and lightly flour the top. Starting in the center, work your way out in both directions, turning the dough as you work it. Avoid using too much pressure as you push the circle larger so that you don’t taper the ends.
Anytime the dough begins to feel warm, or you see butter starting to melt, place the dough back in the fridge or the freezer for a few minutes before continuing.
Roll the dough out larger than the pie dish you will be cooking in, about 13 inches for a 9-inch pie pan. As the circle becomes larger, you’ll see a lot of cracks forming on the outside. Don’t worry about that since you’ll be trimming the extra length off before baking. Keep in mind that those perfect circles you buy premade in a store are made by machines and precision cut to be that way. If you do get little cracks that are too far into the circle, use some water to reseal them and some flour to paste it together.
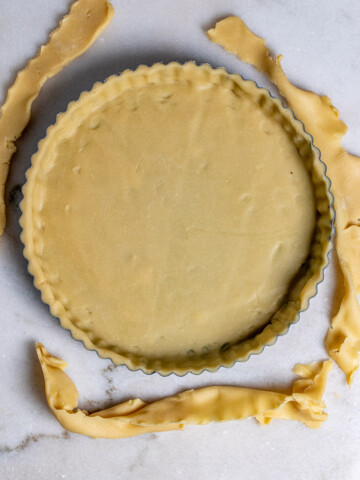
When you’re ready, gently, and loosely roll the pie dough onto your rolling pin and gently unroll it over your pie dish. Straighten it out and gently tuck it into the sides and bottom of your pie dish without stretching it and follow any directions in the recipe for how to decorate and trim from here.
Make Ahead All-Butter Pie Crusts
If you want to make pie crusts ahead of time, you can make them into separate discs and wrap them in plastic wrap and again in foil, then freeze for up to 3 months in a freezer safe zipper lock bag.
Alternatively, you can get some foil pie pans and roll the dough out, then fill the pie pans as if you’re about to make a pie. From here, place the prepared pie pans in the freeze for at least an hour, then remove and wrap in plastic wrap and again in foil, then freeze for up to 3 months in a freezer safe zipper lock bag. Once frozen, you can even wrap in plastic wrap and then stack a couple together before storing.
📋 Recipe
How to Make a Flaky All-Butter Pie Crust
Ingredients
- 2 ½ cups all-purpose flour, divided
- 1 teaspoon salt
- 1 tablespoon sugar, optional
- 1 cup unsalted butter, 2 sticks
- ¾ cup ice-water, see notes
Directions
- Cut the butter into ½” cubes and set in a bowl. Measure the flour into a separate bowl and place both bowls into the freezer for at least 15 minutes.
- Divide the flour into 1 ½ cups and 1 cup.
If Making by Hand:
- Combine the 1 ½ cups of flour with the salt and sugar (if using) and reserve the other 1 cup of flour.
- Using a pastry cutter, cut the butter into the flour and keep mixing until it looks well combined, and you have large, pea-sized pieces of butter coated in flour. If the butter is getting warm, toss back into the freezer for 5 minutes before continuing.
- Add the rest of the flour and continue cutting the butter mixture into the rest of the flour until there’s very little loose flour left.
- Using a tablespoon, begin adding the ice-water 2 tablespoons at a time. Use a hard spatula or your hands to combine. After 6 tablespoons worth, add more water 1 tablespoon at a time until the dough feels like it’s coming together. It should feel thick and moist, but not wet and sticky. If it crumbles apart when you pinch it, add some more water. You should end up using around 7-9 tablespoons of water, or roughly ½ a cup (again, see notes).
- Push the dough together until it forms a rough ball and place on a lightly floured surface. Cut the ball in half and form two equal disc shaped pieces, about 1” thick.
- Wrap each disc with plastic wrap and refrigerate for at least 2 hours, or up to 3-4 days.
If Using a Food Processor:
- Add 1 ½ cups of flour along with the salt and sugar (if using) into the food processor. Pulse 3-4 times to combine.
- Add the butter cubes and blend for 10-15 seconds until a loose dough begins to form.
- Scrape down the sides and add the remaining 1 cup of flour. Pulse 4-5 times until all the remaining flour is combined. It should look like a crumbly dough now.
- Do NOT add the water to the food processor. Instead, turn the dough out into a mixing bowl before continuing (see notes).
- Using a tablespoon, begin adding the ice-water 2 tablespoons at a time. Use a hard spatula or your hands to combine. After 6 tablespoons worth, add more water 1 tablespoon at a time until the dough feels like it’s coming together. It should feel thick and moist, but not wet and sticky. If it crumbles apart when you pinch it, add some more water. You should end up using around 7-9 tablespoons of water, or roughly ½ a cup (again, see notes).
- Push the dough together until it forms a rough ball and place on a lightly floured surface. Cut the ball in half and form two equal disc shaped pieces, about 1” thick.
- Wrap each disc with plastic wrap and refrigerate for at least 2 hours, or up to 3-4 days.
Rolling Out the Dough:
- After chilling your pie crust discs for at least two hours, remove one of them and let it stand at room temperature for 5-10 minutes if it feels solid. Only work on one disc at a time while the other stays chilled.
- Lightly flour your work surface, as well as your hands and your rolling pin. It’s a good idea to keep a small bowl of flour and a small bowl of ice water handy while you work on rolling out the dough.
- Remove the disc from the plastic wrap and place on work surface and lightly flour the top. Starting in the center, work your way out in both directions, turning the dough as you work it. Avoid using too much pressure as you push the circle larger so that you don’t taper the ends.
- Anytime the dough begins to feel warm, or you see butter starting to melt, place the dough back in the fridge or the freezer for a few minutes before continuing.
- Lift the dough occasionally to make sure it isn’t sticking, adding some more flour when needed. If you notice cracks forming, use a little bit of water to reseal the broken edges and a little flour to paste it back together.
- Roll the dough into a rough circle about 13” wide (for a 9” pie pan) and about ⅛” thick. When your dough is ready, gently roll it onto the rolling pin and unroll it over your pie pan.
- Gently press the dough into the sides and bottom of the pan without stretching or tearing it. Chill or freeze the pie dough before filling it, and from here follow the recipe for the type of pie you are making.
Equipment Used
Notes
Your Notes
Nutrition


Comments
No Comments